Notification Configuration En
How to configure notifications
In ERPNext you can recieve and configure notifications about doctype changes. Also the notifications can be sent in email. To do this you need to configure an email account for notification
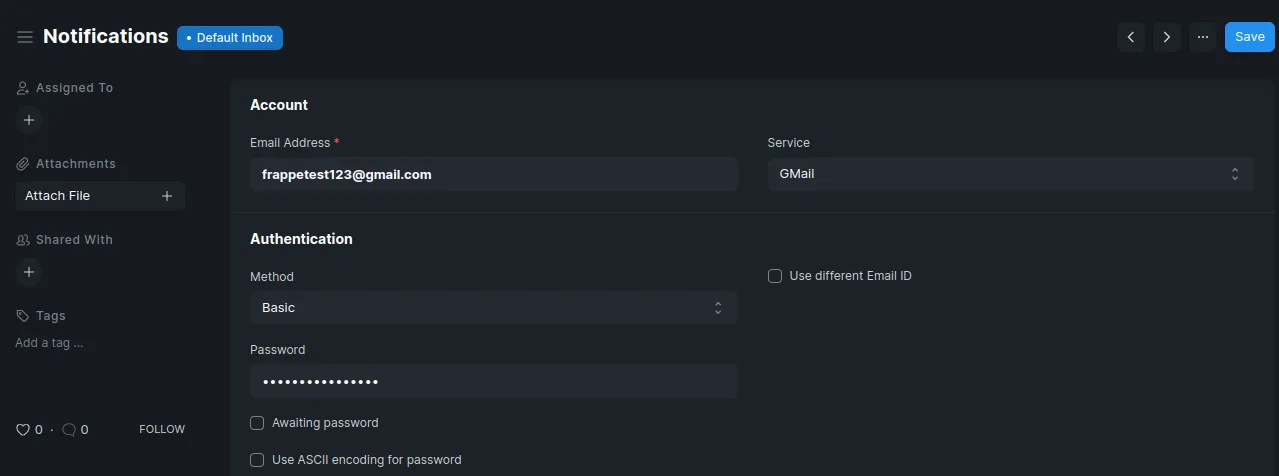
How to create an Email Account
To create an email account you need to:
- Go to the Email Account list, click on New.
- Enter the email address with the domain. Domains need to be created in order to create an email account. You don’t need to create a domain if you’re syncing an email from certain providers as listed here.
- Enter the email account password.
- Save. If the credentials are correct, the email account will be synced.
How to configure Notifications
You can configure various notifications in your system to remind you of important activities.
- The completion date of a Task.
- Expected Delivery Date of a Sales Order.
- Expected Payment Date.
- A reminder of follow up.
- If an Order greater than a particular value is received or sent.
- Expiry notification for a Contract.
- Completion/Status change of a Task.
To access notification setup use search bar or go to:
Settings > NotificationSetting Up An Alert
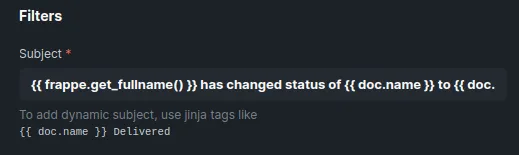
To set up a Notification:
-
Write a subject of a notification. You can use Jinja tags
-
Select the Document Type you want to watch changes on.

-
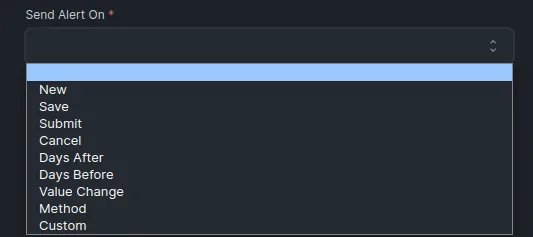
Define what events you want to watch under Send Alert On. Events are:
- New: When a new document of the selected type is made.
- Save/Submit/Cancel: When a document of the selected type is saved, submitted, or canceled.
- Days Before/Days After: Trigger this alert a few days before or after the Reference Date. To set the days, set Days Before or After. This can be useful in reminding you of upcoming due dates or reminding you to follow up on certain leads of quotations.
- Value Change: When a particular value in the selected type changes.
- Method: Sends notification when a specific method is triggered. Eg: before_insert.
- Custom: Send a notification to an Email Account selected.
-
Turn on the “Send System Notification” option if you want the notification to show up in the notifications dropdown on the top right corner of the navigation bar.
-
In the “Sender Email” form write down the email created for notification

-
Set additional Conditions if required.
-
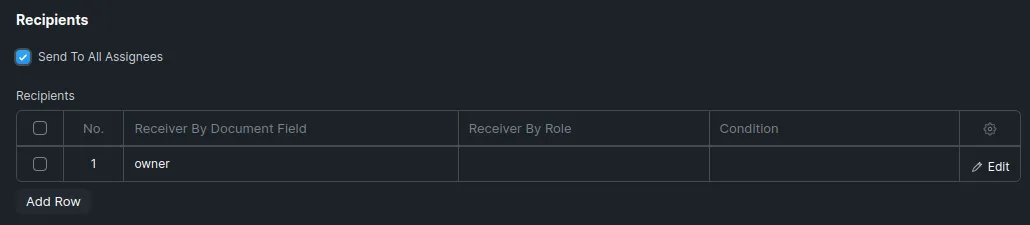
Set the recipients of this alert. The recipient could either be a field of the document or a list of fixed Email Addresses.

8 Compose the message. 9 Save.
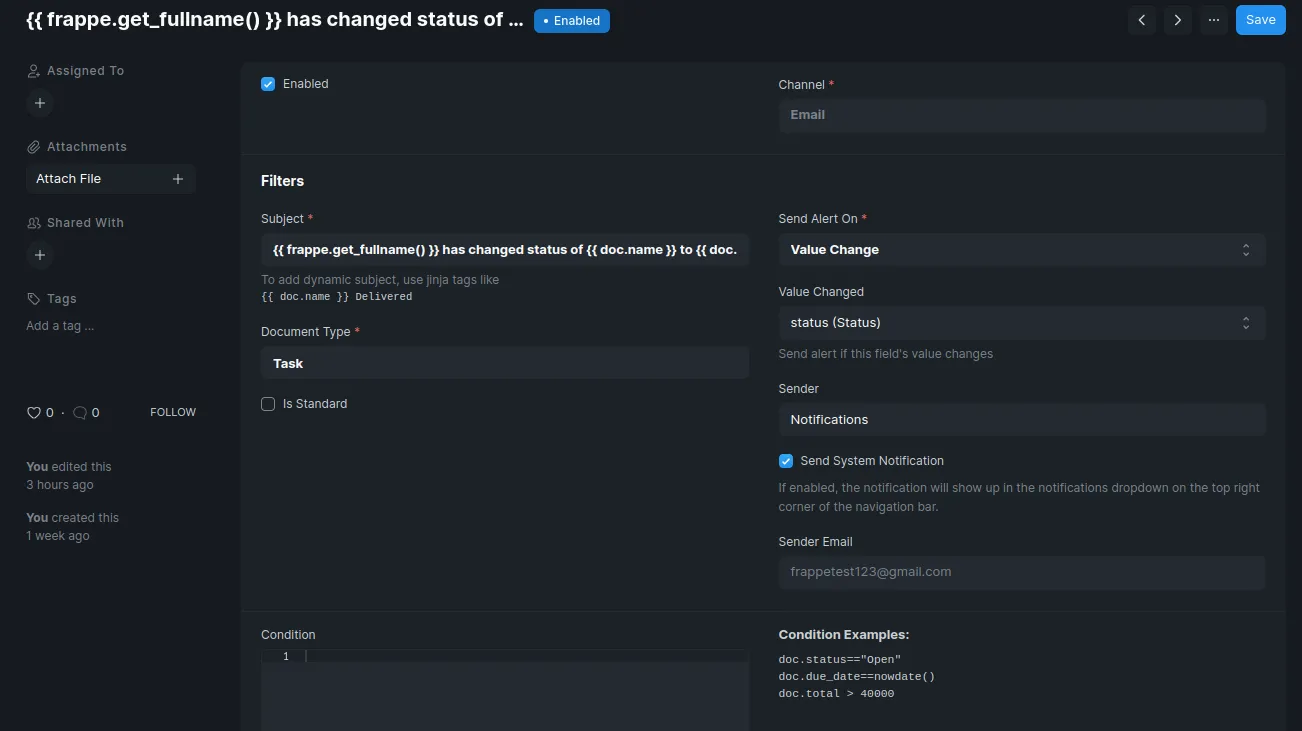
Setting Notification about task status changed
For instance we need to configure a notification for task status changing. To do this we need to indicate the Value Change option in the Send Alert On field and choose the status (Status) option in the Value Changed field
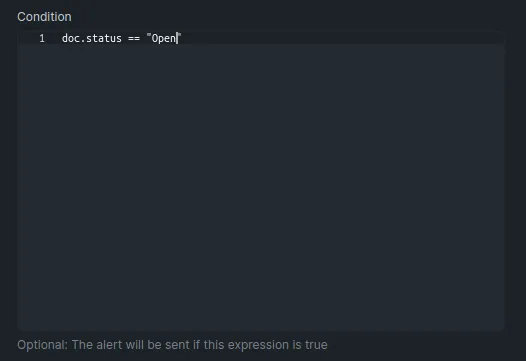
Notifications allow you to set conditions according to the field data in your documents. For example, if you want to receive an Email if a Lead has been saved as “Interested” as it’s status, you put doc.status == “Interested” in the conditions textbox. You can also set more complex conditions by combining them with the operator and or or.
In our case there is no need to set the conditions. Now we can choose the recipients of this notification. In our case the owner and the asignees must receive this notification. So we indicate the owner in the Recipients table.We have the Send To All Assignees to make the asignees receive this notification
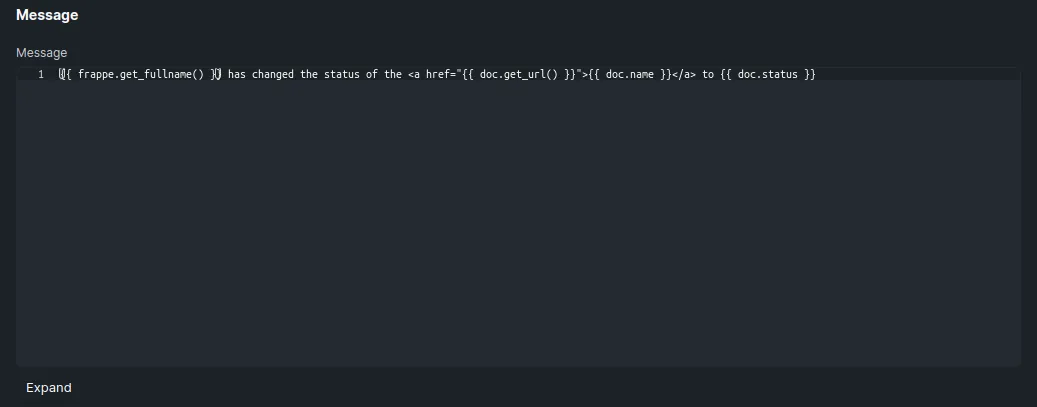
Now we have to write a message of the notification. We can use Jinja and HTML tags to make the message dynamic.
You can find full documentation of Jinja here. Also the Doctype API Documentation could be usable
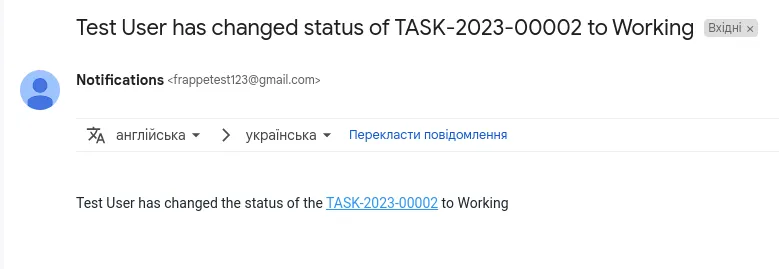
We can get full name of the user which changed a task status via frappe.get_fullname(). Using the doc.name we can get the name of the task. doc.status tag is used to get status of the task
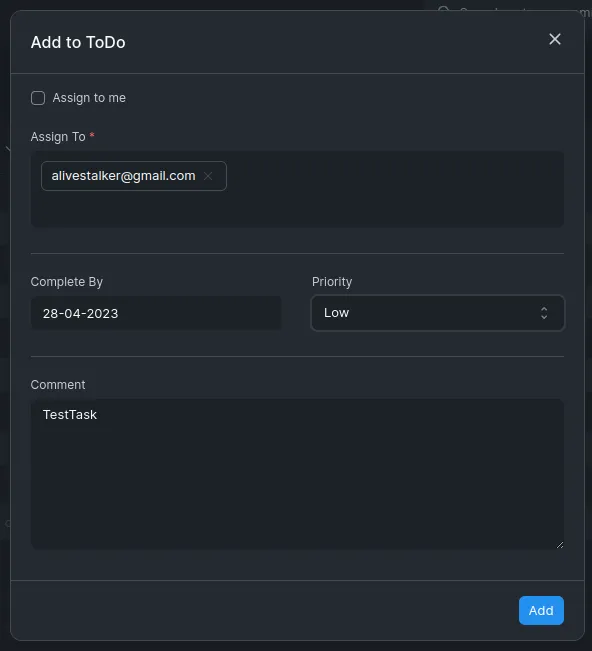
Now we can check if this notification works by changing a status of a custom task.
Let’s assign a test task to a test user and change the status of the test task to “Working”:

System notification appeared on test user account:
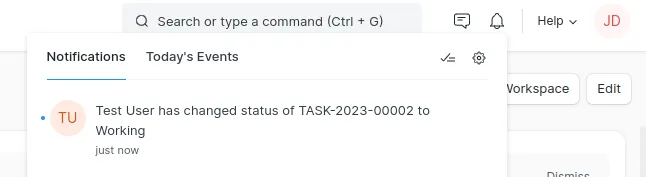
Also, a message about changing the status of the task appears in the e-mail: