Data Import Export En
Export / Import data from one Doctype to another
In ERPNext you can import data from one doctype to another, using Data Export Tool and Data Import Tool.
Data Export Tool
Data Export lets you export data from DocTypes to a CSV or an Excel format. After exporting data, you can use the same file to import data using Data Import.
You can find Data Export Tool using a search bar or you can access it by going to:
Settings -> Data ExportHow to use Data Export
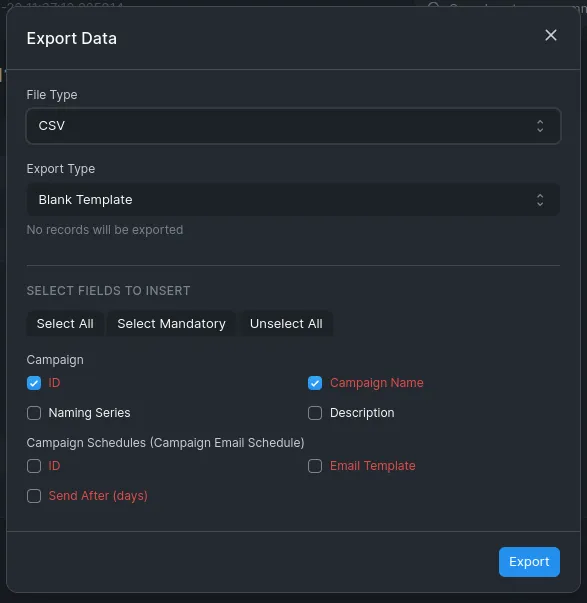
- Go to the Data Export DocType.
- Select the DocType whose data you want to export.
- Select the file format whether CSV or Excel.
- Select the fields to export, the red ones are mandatory.
- You can also add filters to select only specific data, for example, Grand Total >= 1,000 for Sales Orders.
- Click on Export to download the file.

How to modify CSV or Excel file for import
When you receive a CSV or Excel file, you need to modify it to import data correctly without losing any fields. You have to enshure that in data file there are needed fields only.
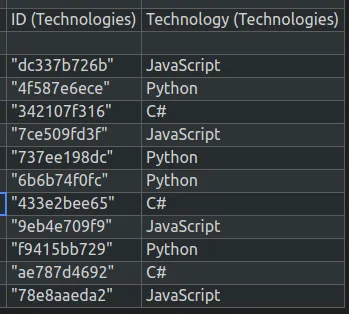
When recieving data file we get something like this:
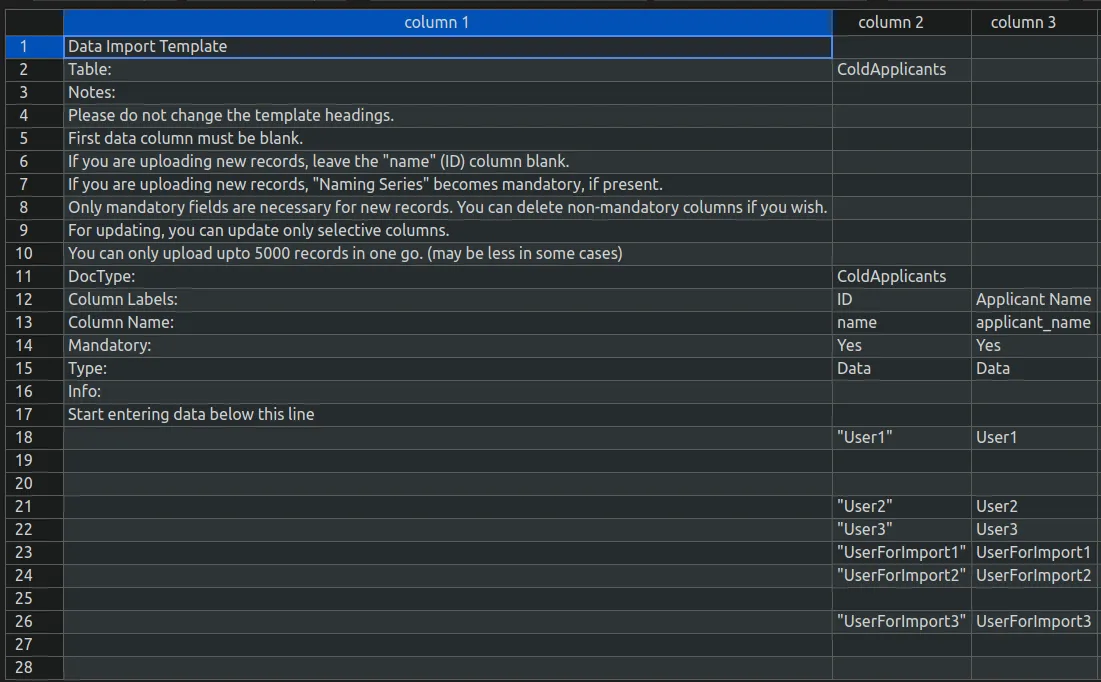
There are columns and rows which need to be deleted so you can implement correct import of data. In image below specified which columns and rows you need to delete:

Child Tables
We can export doctypes which contain child tables. In Data Export Tool child tables are separated from the others fields like this:
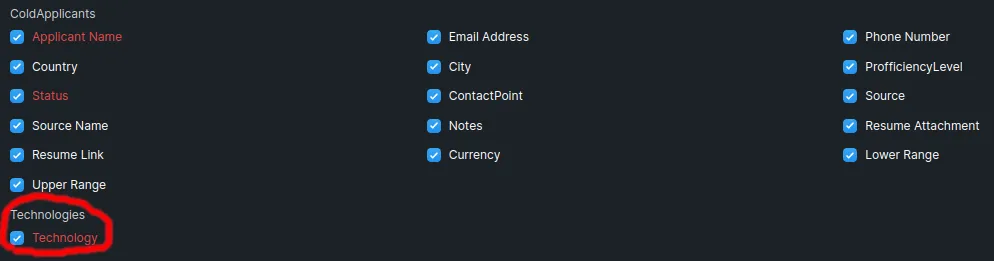
For instance we have the ColdApplicants doctype in which there is Technologies field. In recieved CSV or Excel file it will be separated by the ’~’ symbol like this:
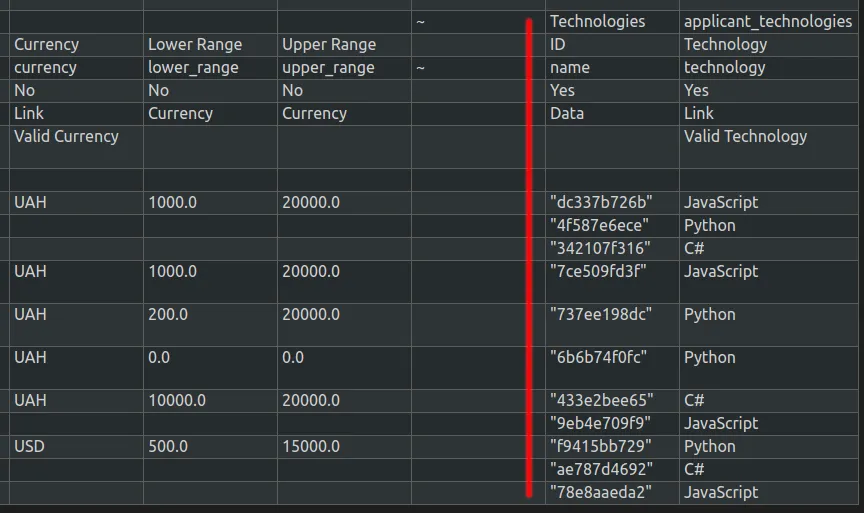
We need to add a name of the child table near name of the fields that related to this table in brackets to indicate that these fields belong to the child table.
Before importing files, you need to check whether the names of the fields match and check whether all the fields that are in the export doctype exist in the import doctype. If the import doctype does not have the same fields as the export doctype, you need to add them manually using doctype customization
Adding non-existent fields
To add the new fields in a doctype:
-
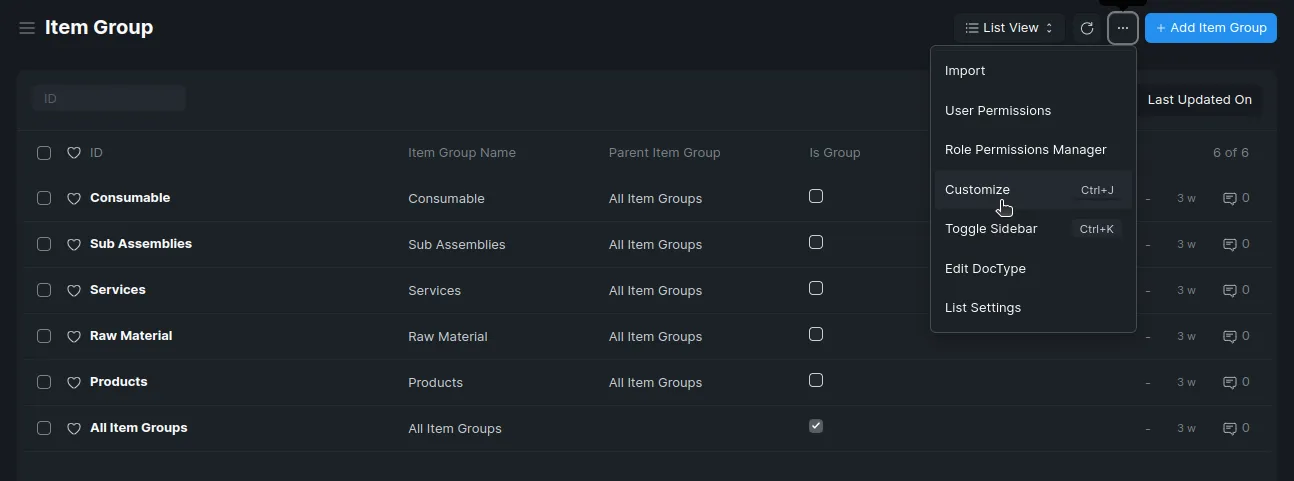
Choose a doctype for adding a new field
-
Click on the “Customize” button
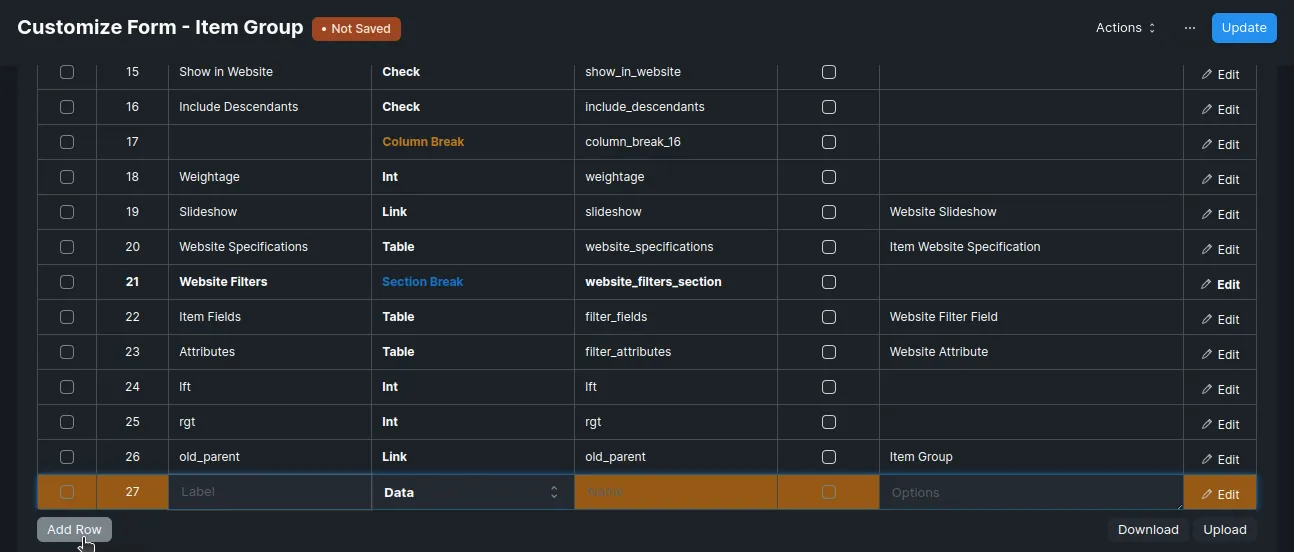
-
Click the “Add Row” button
-
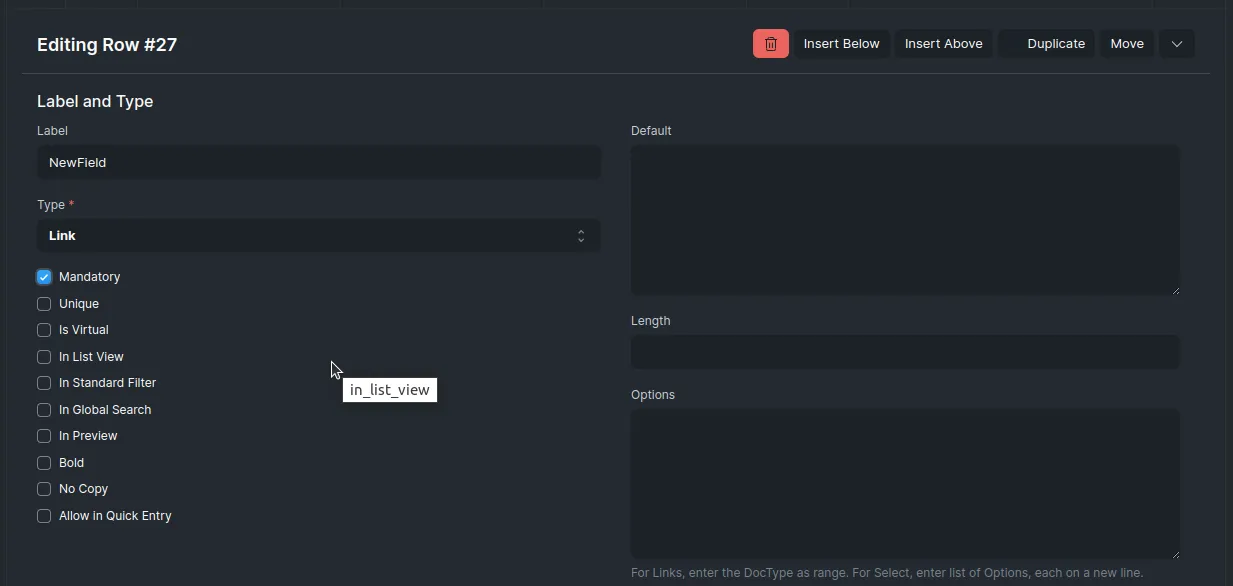
Enter what Label would you like to give to the new field. Field Type: ERPNext already has a set of Field Types defined which can be fetched from the drop-down menu. You can select the Type of your Custom Field from within this menu.
-
Add some options if you need
You can find additional information about options and properties from official documentation: https://docs.erpnext.com/docs/v13/user/manual/en/customize-erpnext/custom-field
Data Import Tool
Data Import Tool is an easy way to upload (or edit) bulk data (especially master data) into the system.
You can find Data Import Tool using a search bar or you can access it by going to:
Settings -> Data ImportTo start data importing you need to click on the Add Data Import button in Data Import Tool.
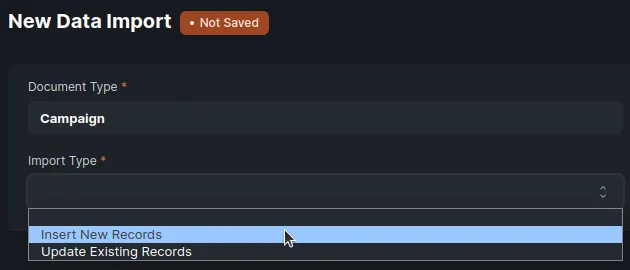
How to use Data Import
-
Click on the Add Data Import button in Data Import Tool.
-
Choose the doctype to import data
-
Select Insert New Records or Update Existing Records option
-
Press the “Save” button
-
Press the “Attach” button and choose the data file
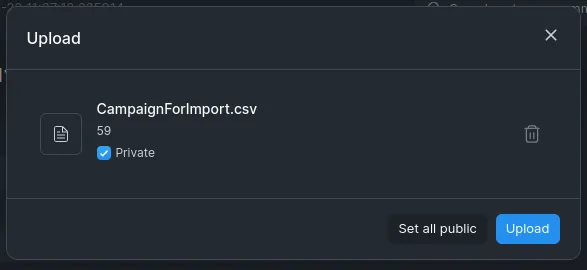
-
Press the “Start Import” button
-
If there are some errors elimiante them

For some doctypes there is no permission to import data. Thus you’ll have to recieve this permission
Role Permission Manager
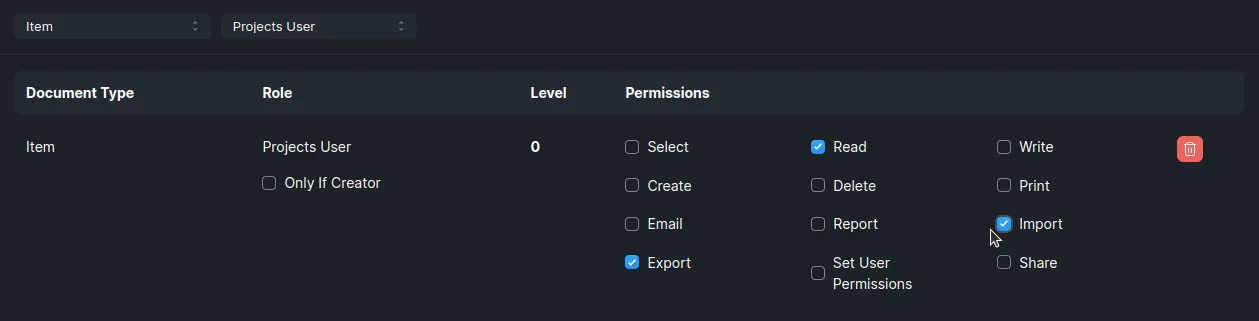
ERPNext has a role-based permission system. It means that you can assign Roles to Users, and Permissions can be set on Roles. The Role Permissions Manager allows you to set which roles can access which documents and with what permissions (read, write, submit, etc.).
Once roles are assigned to a user, their access can be limited to specific documents. The permission structure allows you to define different permission rules for different fields using a concept called Permission Level of a field.
You can find Role Permission Manager using a search bar or you can access it by going to:
Users -> Role Permission ManagerHow to use Role Permission Manager
-
Go to the Role Permission Manager doctype
-
Choose the needed doctype
-
Choose the role for which you’ll give a permission
-
Press the “Add a New Rule” button
-
Choose a permission level (Level 0 is for document level permissions, higher levels for field level permissions.)
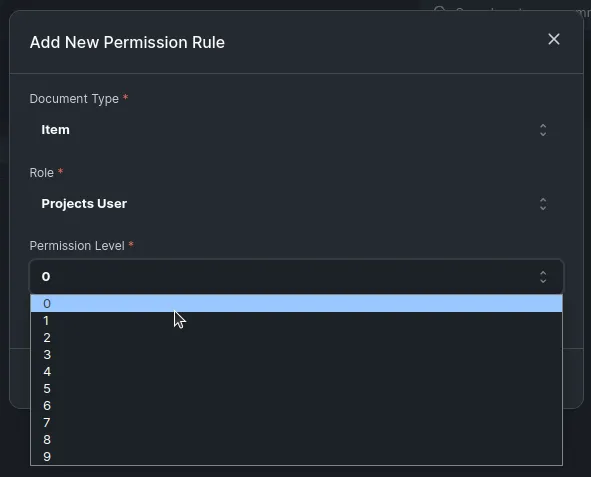
-
Click on the “Add” button
-
Select the permissions for the role
You might need to download the template of current doctype to enter the data by yourself in CSV or Excel file
Download the Template
Before importing data you can download the template of current doctype to inject data using CSV or Excel
-
Click on the “Download Template” button
-
Choose file type (CSV or Excel)
-
Select the needed fields for export
-
Press the “Export” button