Instruction For Crm
CRM: Instruction
General functionality
How to Log Into the CRM
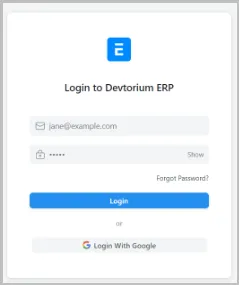
To log into CRM:
- User opens your Internet browser and goes to the CRM site https://erp.morebis.net/login#login
- User clicks the link at the top right to Log in.
The login dialog is displayed.
-
User enters login and password
-
User click Log in
NOTE: Login should contain the Morebis domain address.
User can use Login in with a Google:
- User clicks on the button Login with Google.
- User chose his Morebis domain address in the pop up. User will be redirected to the main page of CRM.
How to Log Out
To log out of CRM:
1. In the upper right-hand corner of the page, user clicks the circle with your initials.
![]() The drop down list with common settings is displayed.
2. User selects Log out.
The drop down list with common settings is displayed.
2. User selects Log out.
The system logs you out and returns you to the login page.
Main functionality of CRM app
- Header of the CRM app
![]()
On the Header of the CRM user can see:
![]() - the link to the start page;
- the link to the start page;
![]() - the road to the current page;
- the road to the current page;
![]() - the search field;
- the search field;
![]() - the notification button;
- the notification button;
After clicking on this button, the user can see the pop up with:
-Notifications tab; -Today’s Events tab.
![]() - drop-down list with sources of help;
- drop-down list with sources of help;
After clicking on, the user can see in this drop-down list:
-Documentation – link on the site with external manual; -Other fields – disabled by Frappe.
![]() - drop-down list with settings for account ( see – Account settings );
- drop-down list with settings for account ( see – Account settings );
- Account settings
To open account settings for user:
-in the upper right-hand corner of the page, User clicks the circle with your initials.
The drop down list with common settings is displayed.
My Profile The page contains common statistical information about user activities
NOTE: not suitable for CRM.
My Settings The page contains blocks with settings for user accounts.
Blocks:
-
Connections – display the actual user connections with active bases:
-Profile,
-Logs,
-Settings,
-Activity,
- Integration.
NOTE: The number on the base shows the number of connections.
-
Basic info – display the common user information:
-E-mail – can’t be changed,
-First Name – can be changed,
-Last Name – can be changed,
-Full Name – can’t be changed,
-Username – can be changed,
-Language – can be changed,
-Time Zone – can be changed.
-
More information – display the other common user information:
-Gender– can be changed,
-Phone – can be changed,
-Mobile No – can be changed,
-Birth Date – can be changed,
-Location – can be changed,
-Interests – can be changed,
-Bio – can be changed,
-Banner Image – attach file,
-Mute Sounds – on or off,
-Desk Theme – light or dark.
-
Change password – feature for changing user password.
-
Document Follow – feature to set user subscription for each document:
-Send Notifications For Documents Followed By Me – on or off,
-Auto follow documents that you create – on or off,
-Auto follow documents that you comment on – on or off,
-Auto follow documents that you Like – on or off,
-Auto follow documents that are assigned to you – on or off,
-Auto follow documents that are shared with you – on or off,
-Auto follow documents that are assigned to you – on or off,
-Frequency – set up periodicity.
-
E-mail – feature to set user settings for mailing:
-Email Signature – define,
-Send Notifications For Email Threads – on or off,
-Send Me A Copy of Outgoing Emails – on or off,
-Allowed In Mentions – on or off.
-
Third Party Authentication – feature to set user connection with external resources.
-
Add a comment – note important information.
-
Backlog with history of changes.
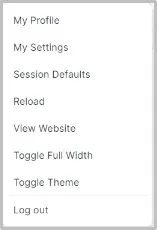
Session Defaults The pop - up contains information and possibility to change companies for the current app session.
NOTE: by default Devtorium.
Reload – functionality to reload the page.
View Website – not suitable for Devtorium company.
Toggle Full Width – expands the page margin.
Toggle Theme – light or dark.
Log out – log out the application.
- Left sidebar of the CRM app:
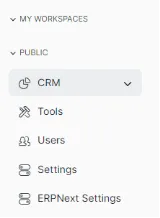
On the Left sidebar of the CRM user can see:
-My workspaces block - users can create their own configuration of tabs. -Public block - predefined configuration of tabs.
Public block contains:
-CRM tab - page with functionality for working with potential clients ( Bases, Reports ); -Tools tab - page with functionality for working with activities; -Users tab - settings for users; -Settings tab - common settings for CRM; -ERPNext Settings tab - internal settings for CRM.
–CRM page
To open CRM page for user:
-in the left side bar on the home page, user clicks on the CRM tab.
The CRM page with common links and bases is displayed.
The page contains:
- block with Charts,
- block Your Shortcuts,
- block Reports and Masters.
This configuration can be changed by clicking the Edit button in the header of the page.
![]()
After clicking this button, all blocks are available for editing.
In the upper right corner of each block will be available buttons for editing:
![]() - EDIT, edits the current chart;
- EDIT, edits the current chart;
![]() - DRAG, changes location the current chart;
- DRAG, changes location the current chart;
![]() - SETTING, configures or deletes the current chart.
- SETTING, configures or deletes the current chart.
- Block with Chart:
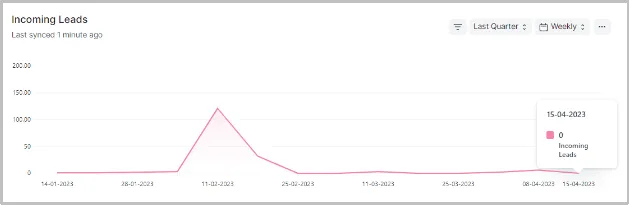
In the Chart block users can see statistical information and configure this information.
Block contains:
![]() - Filters for setting periodicity;
- Filters for setting periodicity;
 - Edit button.
- Block with Your Shortcuts:

In the Your Shortcuts block the user has quick access to familiar pages.
- Block with Reports and Masters:
In the Reports and Masters block users can open pages for working.
Block contains:
- Sales Pipeline column,
- Reports column,
- Campaign column,
- Custom Reports column.
Sales Pipeline column:
- Lead,
- Opportunity,
- Prospect,
- Customer,
- Contact,
- Communication,
- Contract,
- Appointment;
- Quotation.
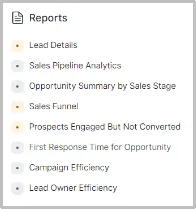
Reports column:
- Lead Details,
- Sales Pipeline Analytics,
- Opportunity Summary by Sales Stage,
- Sales Funnel,
- Prospects Engaged but not Converted,
- First Response Time for Opportunity,
- Campaign Efficiency,
- Lead Owner Efficiency.
Campaign column:
- Campaign.
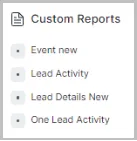
Custom Reports column:
- All Leads Activity,
- Event new,
- Lead Activity,
- Lead Details New,
- One Lead Activity.
NOTE: This configuration can be changed by clicking the Edit button in the header of the page.
–Tools page
To open Tools page for user:
- in the left side bar on the home page, user clicks on the Tools tab.
![]()
The Tools page with common links is displayed.
The page contains:
- block Reports and Masters.
Block contains:
- Tools column,
Tools column:
- To Do,
- Calendar,
- Note,
- Files,
- Activity,
- Event.
NOTE: This configuration can be changed by clicking the Edit button in the header of the page.
–Users page
To open Users page for user:
- in the left side bar on the home page, user clicks on the Users tab.
![]()
The Users page with common links is displayed.
The page contains:
- block Reports and Masters.
Block contains:
- Users column,
- Activity Log column
NOTE: This configuration can be changed by clicking the Edit button in the header of the page.
–Settings page
To open Settings page for user:
- in the left side bar on the home page, user clicks on the Settings tab.
![]()
The Settings page with common links is displayed.
The page contains:
- block Reports and Masters.
Block contains:
- Data column,
- Email/Notifications column,
- Workflow column.
Data column:
- Import Data,
- Export Data.
Email/Notifications column:
- Email Account,
- Email Template,
- Auto Email Report,
- Notification Settings.
Workflow column:
- Workflow Action.
NOTE: This configuration can be changed by clicking the Edit button in the header of the page.
- Functionality on pages:
–Main filters block
Each page in CRM contains the Main filters block:
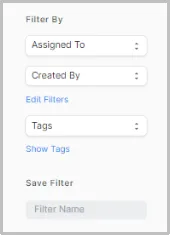
By default this block has 2 types for filtration:
- Assigned To;
- Created By.
User can add other indicators for filtration by clicking on the Edit Filter link.
For each page these indicators are different and depend on what indicators are using on this page:
- Lead page:
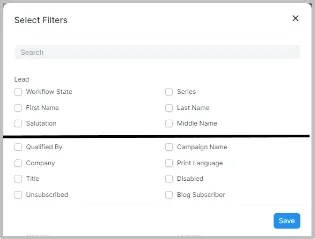
- Opportunity page:

After choosing and saving, the selected indicators will be added to the block with filters and can be selected for filtering.
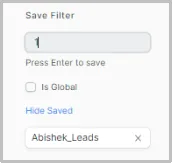
Users can create their own filter configuration and save it for using. This filter configuration can be set for all users. This block contains information about the owner of this filter’s configuration.
–Filters for columns in the tables
User can order the table column in ascending (up arrow) or descending (down arrow) order. Right-click the column heading to display the sorting options:
![]()
User clicks the link at the top right.
The drop down list with common settings is displayed.
Possible variants:
-Last Updated On,
-Title,
-ID,
-Created On,
-Most Used,
-Job Title,
-Lead Owner,
-Status,
-Activities,
-Last Activity Date,
-Organization Name.
User can also change the sequence of columns to show information in an order that suits your needs.
User selects the column that you want to move.
User drags and drops the column to the new location in the table, as shown in the following example.
–Advanced Column Filters for the table
If a column header displays a magnifying glass icon, users can use the advanced filter options to filter data.
Users can filter a single column or use a combination of column filters to locate specific items.
User clicks the icon on the column header of the row.
![]()
User selects a filter option.
The advanced column filter options are displayed.
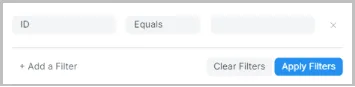
NOTE: the options displayed depend on the type of fields, numeric or alphanumeric fields display a different set of options.
NOTE: If the user changes the filter option, press Enter to start the search. Select reset to clear the filter.
–Header functionality

-
Toggle sidebar button: the function of hiding or showing the left sidebar on the page;
-
Title of page;
-
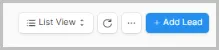
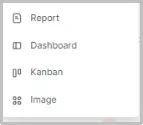
List View: drop down list for choosing the different configuration for the page:
possible variants:
-
List ( by default );
-
Report;
-
Dashboard;
-
Kanban;
-
Image.
-
-
Reload button: reload page.
-
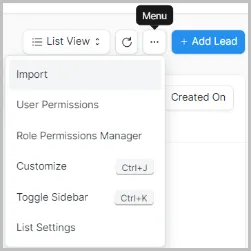
Menu: drop down list with functions:
-
Import – open Import page;
-
Toggle sidebar – the function of hiding or showing the left sidebar on the page;
-
-
Add button: create new entity.
–Views of page
Users have the opportunity to configure the page in 5 different variants.
Click on the drop down list ‘List View’ on the left corner of the page header.
and chose appreciated for your variant.
-List ( by default ):

This variant of page has standard configuration of page for filters and header (Described in part – Functionality for page)
-Report:
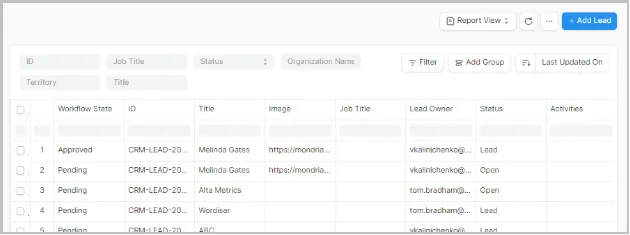
This variant of the page has additional functionality for configuring tables with information for reports.
For starting these additional functions, the user has to click on the Menu button in the Header of page.
In the drop down list user can see:
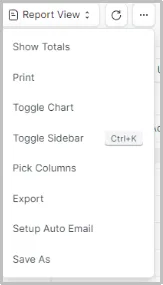
- Show Totals: add a line with the total amount to the table;
- Print: print current table;
- Toggle Chart: open pop up with option for creation chart based on information in table;
- Toggle sidebar: the function of hiding or showing the left sidebar on the page;
- Pick Columns: configure columns in table;
- Export: export table to the .xls file;
- Setup Auto E-mail: settings for mailing;
- Save As: save new configuration of reports table.
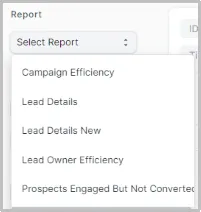
Beside this, the page contains a drop down list “Report” for selecting reports for use.
-Dashboard:
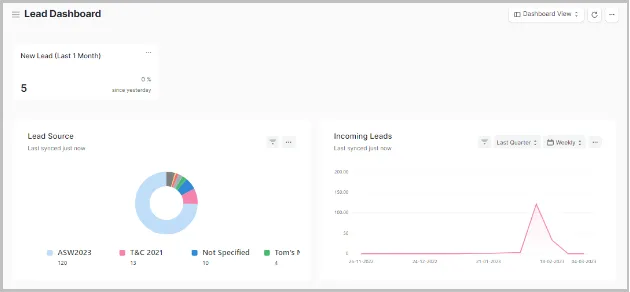
This variant of the page has additional functionality for configuring Dashboard.
For starting these additional functions, the user has to click Customize Dashboard on Menu button in the Header of page.
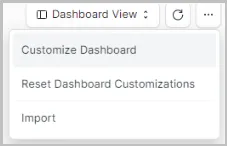
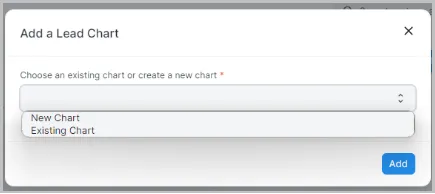
The fields for Customize Dashboard are displayed.
After this, user can choose which variant of customization is appreciated for him:
- New Chart or
- Existing Chart.
For New Chart, user sets up common options and clicks Add button:
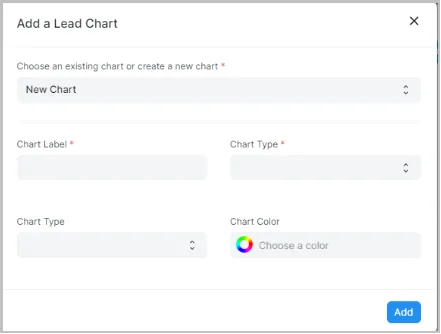
The New Chart is displayed on the page.
-Kanban:
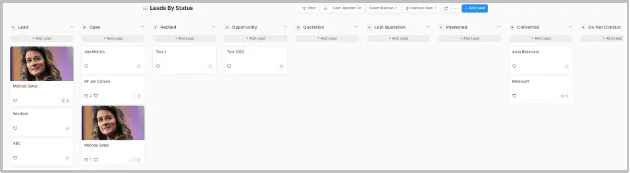
This variant of the page has additional functionality for configuring Kanban boards.
For starting these additional functions, the user has to click Create New Kanban Board in the Select Kanban drop down list in the Header of page.
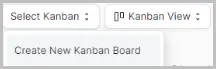
The pop up for Create New Kanban Board is displayed.
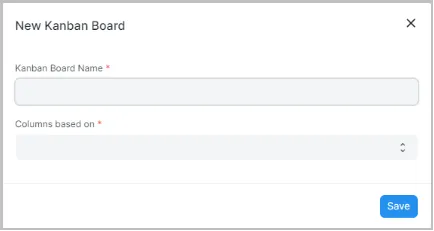
Users can choose which variant of board is appreciated for him and give it a name.
Possible variants of board are based on columns:
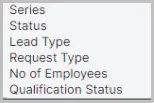
After clicking on the Save button, the Kanban board with new configuration will be saved in the Select Kanban drop down list in the Header of page.
Beside this, Kanban Board can be configured by filters.
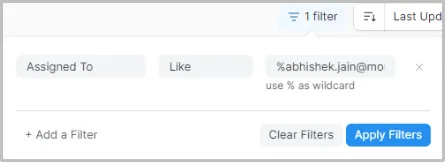
If necessary, the user can delete a kanban board using the Delete Kanban Board button on the menu.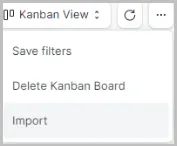
-Image:
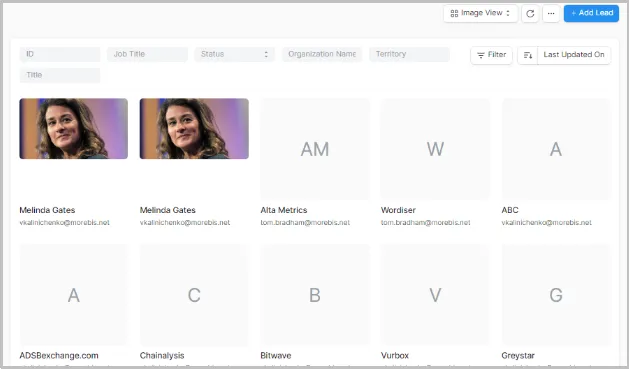
This variant of page has standard configuration of page for filters and header (Described in part – Functionality for page).
Common functionality on the pages
- Left sidebar functionality
\1) Add the photo to a lead:
- User clicks on the ‘Change’ button on the left bar.
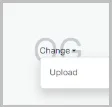
The Upload pop up is displayed.
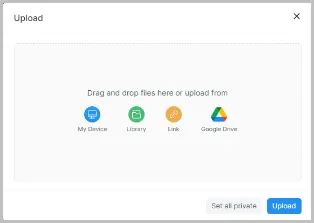
-User choose the file and upload it by clicking on the ‘Upload’ button on the pop up.
The system adds the photo and returns you to the lead page.
\2) Assign the Lead to a user:
-User clicks on the ‘Assigned To’ button on the left bar.
The Add to ToDo pop up is displayed.
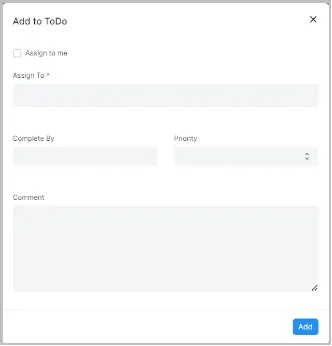
- User fills in all required fields:
FIELDS:
-Assign To: the user to whom this lead will be assigned.
-Complete By: calendar to indicate the date when the lead has to be completed.
-Priority: level of priority for this lead.
-Comment: additional information.
- User clicks on the ‘Add’ button on the pop up.
The system assigns the lead to the user and returns you to the lead page.
\3) Attach the files/images to a lead:
-User clicks on the ‘Attach File’ button on the left bar.
The Upload pop up is displayed.
-User choose the file and upload it by clicking on the ‘Upload’ button on the pop up.
The system adds the files/images and returns you to the lead page.
\4) Share the Lead with a user:
- User clicks on the ‘Shared with’ button on the left bar.
The Share with pop up is displayed.
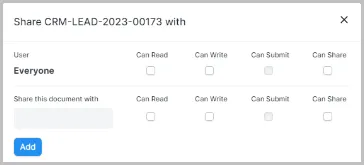
The lead can be shared with everyone or with a specific person.
-User Fills in required checkboxes depends on the scope of permissions: Read, Write, Submit, Share
-User clicks on the ‘Add’ button on the pop up.
The system shares the lead with the user and returns you to the lead page.
- Tag the Lead:
- User clicks on the ‘Add a tag’ button on the left bar.
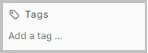
- User cpecifies the tag for the lead in the open field.
The system tags the lead and the user can filter the leads by this tag on the Lead list page.
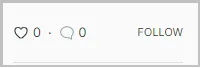
- Follow the lead:
- User clicks on the ‘Follow’ button on the left bar.
![]()
The system marks the lead and the user will receive the notification about the lead.
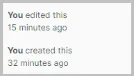
- History of changes for lead:
The system displays the lead creation and editing time.
- Header functionality
![]()
- Toggle sidebar button: the function of hiding or showing the left sidebar on the page;
- Title of lead;
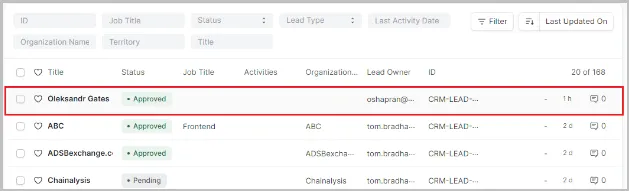
- Internal status of lead: shows the readiness of the lead for work; possible variants:
- Pending – by default after saving;
- Approved – defined by Actions button;
- Reject – defined by the Actions button.
- Helper button: enable the ability to use integration with external resources;
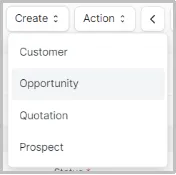
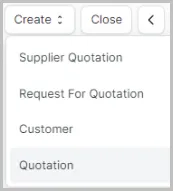
- Create button: drop down list with ability create next documents according workflow: possible variants:
- Customer – add lead to the Customer base;
- Opportunity – create opportunity for lead interested in the products or services;
- Quotation – create proposal for the lead;
- Prospect – add lead to the base with potential customers.
- Action: drop down list with function for adding Lead to Prospect.
- Previous: switch to the previous lead;
- Next: switch to the next lead;
- Print: the function of printing information about leads;
- Menu: drop down list with function
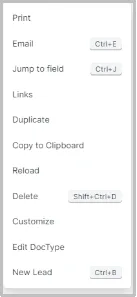
- Print – print the page;
- E-mail – send the letter to the lead;
- Jump to field – select different blocks on the page;
- Duplicate – create the copy of the lead;
- Copy to Clipboard – copy the information of the page in memory;
- Reload – reset the page;
- Delete – delete the lead;
- Customize – configure the fields, filters and other settings on the page;
- Edit DocType - configure the permissions, all entries and other settings on the page;
- New Lead – create new lead.
- Actions button: determine the state of readiness for work; possible variants:
- Approved – lead can be taken into work process;
- Reject – lead can’t be taken into the work process.
LEAD
How to Create a Lead
- User goes to the Lead list and clicks on the Add Lead button.
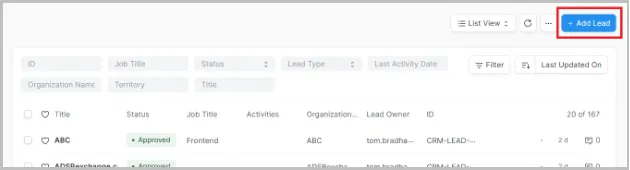
The New Lead page with fields to fill is displayed.
The page contains:
- Header:
![]()
- 6 blocks of information:
- Main info;
- Actions;
- Contact info;
- Organization;
- Qualification;
- Additional Information.
- User fills in all the required fields.
- Main info
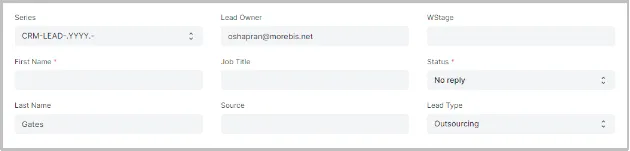
FIELDS:
-
Series – auto generation serial number.
-
First Name – contact person’s name.
NOTE: Required field.
-
Last Name – contact person’s last name.
NOTE: Required field.
-
Lead Owner – filled with the email of the lead author, but can be edited.
-
Job title – position of the contact person.
-
Source – drop down list with different variants for the sources of origin of leads.
possible variants:
Conference, Advertisement, Campaign, Cold Calling, Irene referral, Existing Customer, Mass Mailing, Personal network, Reciprocal communication, Toms Network, Abhisheks Network, Walk in and other.
*can be created by clicking on “+” in the bottom of the list.
NOTE: Required field.
- WStage – level of interaction.
- Status – drop down list with different variants of the leads statuses.
Status is the important field in the Lead. You can set the status manually and also it will be updated automatically based on your actions against the lead.
possible variants:
- No reply: this is the default status assigned when a Lead is created and the Sales executive needs to contact the Lead.
- Replied: sales executive contacts the Lead.
- Cold: sales executive contacted the Lead, but it needs more communication.
- Warm: a sales executive has provided the information needed and response from Lead is awaited.
- Hot: the lead is interested in the products or services.
- Closed: the lead is closed due to internal reasons.
- Lost: lead is not interested and no further communication is needed.
- On hold: lead is interested, but does not need the product or service right now.
NOTE: Required field.
-
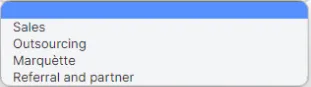
Lead Type – drop down list with different variants of the leads type.
possible variants:
 NOTE: Required field.
- Actions
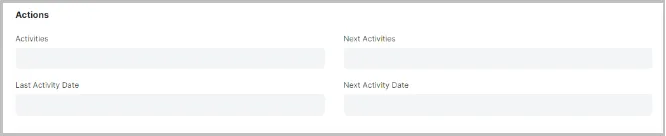
FIELDS:
- Activities – description of current activities regarding the lead;
- Last Activity Date – the date of current activities regarding the lead;
- Next Activities – description of planned activities regarding the lead;
- Next Activity Date – the date of planned activities regarding the lead.
- Contact info

FIELDS:
-
Email – contact person’s email.
NOTE: Required field.
-
Website – website of the contact person’s organization.
-
LinkedIn – contact person’s LinkedIn account.
-
Mobile № – contact person’s mobile phone number.
-
WhatsApp – contact person’s WhatsApp account.
-
Phone – contact person’s phone number.
- Organization
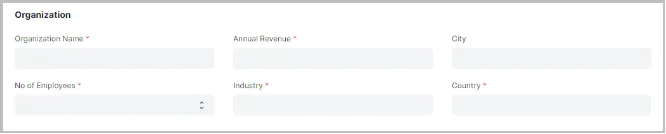
FIELDS:
-
Organization name – contact person’s organization.
NOTE: Required field.
-
№ of employees – the number of employees in an organization.
NOTE: Required field.
-
Annual Revenue - the revenue of an organization.
NOTE: Required field.
-
Industry - the industry of organization.
NOTE: Required field.
-
City - the location of the organization.
-
Country - the country of organization.
NOTE: Required field.
- Qualification

FIELDS:
- Qualification Status - drop down list with levels of the qualification.
possible variants:
- Unqualified: The Lead is not qualified.
- In process: qualification in process.
- Qualified: all necessary information was clarified.
- Qualification By – user who clarified all necessary information.
- Qualification on - calendar to indicate the date when all necessary information was clarified.
- Additional Information:

FIELDS:
- Campaign Name – the name of the mail campaign.
*can be created by clicking on “+” in the bottom of the list or on the Campaign page.
-
Company - the name of the own company.
-
Print Language - the language of communication.
*can be created on the Language page.
-
User clicks on Save button in the Header of the page
The toast message “Saved” in the bottom of the page will be displayed.
![]()
The system saves and adds the lead to the base of the Lead.
Work with Lead
User goes to the Lead list and clicks on Lead in the table.
The Lead page for this lead is opened.
The page contains:
-
The Header with common functionality for lead ( described in part - Header functionality )
-
4 tabs with information and functions for work with lead:
-
Details;
-
Activities;
-
Comments;
-
Connections.
![]()
- Details tab:
Contains all the information that was added during the lead creation process.
(Described in part – How to create a lead )
This information can be changed and clarified.
- Activities tab:
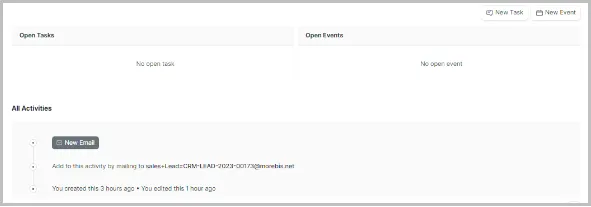
Contains the functionality for communication and fixation of the communication with lead.
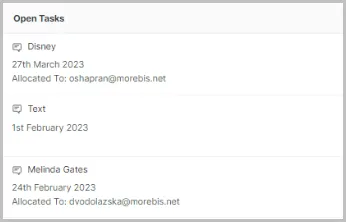
–Open task block
1.User can create a task by clicking the New Task button.
![]()
The New Task pop up is displayed.
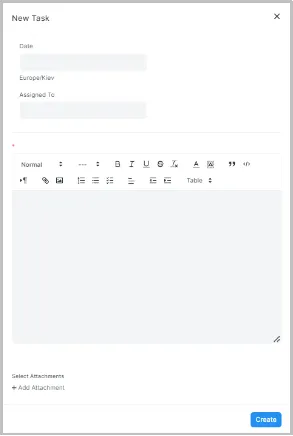
2.User fills in all required fields:
FIELDS:
-Date: calendar to indicate the date when the task will be.
-Assign To: the user to whom this task will be assigned.
-Comment: description for task.
Exist possibility to attach the file by clicking on the ’ Add Attachments’ button at the bottom.
The system adds the files/images to the task.
3.User clicks on the ‘Create’ button.
The system creates the task and adds to the Open task field.
User can click on the title of the task and open the Task page.
The Task page contains:
- Header of the page:

Functionality on the header:
- Name;
- Status;
- Link to the Lead
- Close;
- New;
- Print;
- Settings;
- Save button.
- Main part:
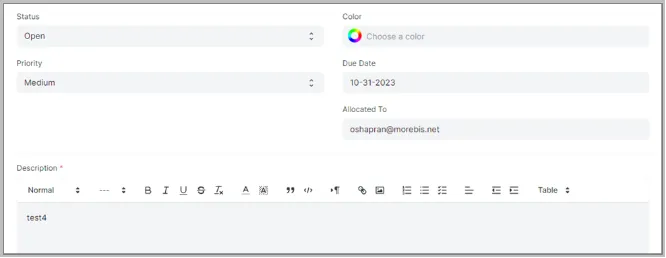
- Reference block: 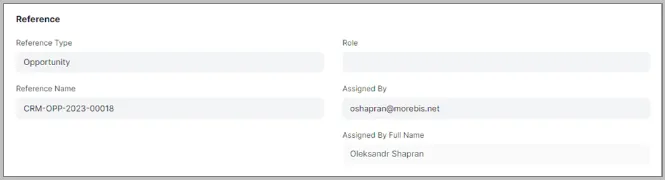
NOTE: After creation, the assignee will be notified with a task notification.
—Open event block
1.User can create an event by clicking the New Event button.
![]()
The New Event pop up is displayed.
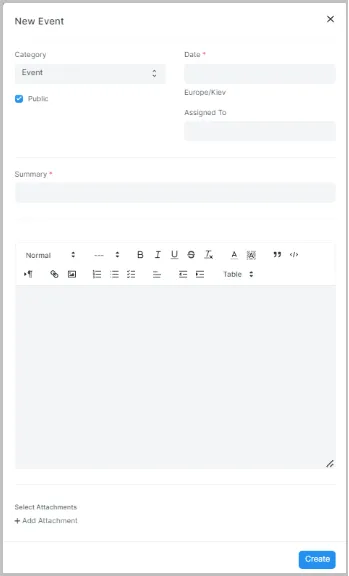
2. User fills in all required fields:
FIELDS:
-Date: calendar to indicate the date when the event will be.
-Assign To: the user to whom this event will be assigned.
-Summary: title of the event.
-Comment: description for event.
“Public” checkbox - functionality for open/hide this task for other users.
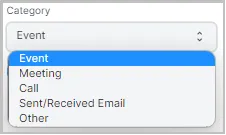
Users can choose different variants of events in the drop down list ‘Category’.
Exist possibility to attach the file by clicking on the ‘Add Attachments’ button at the bottom.
The system adds the files/images to the event.
3.User clicks on the ‘Create’ button.
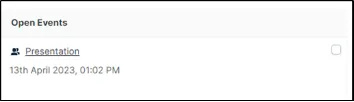
The system creates the event and adds to the Open Events field.

User can click on the title of the event and open the Event page.
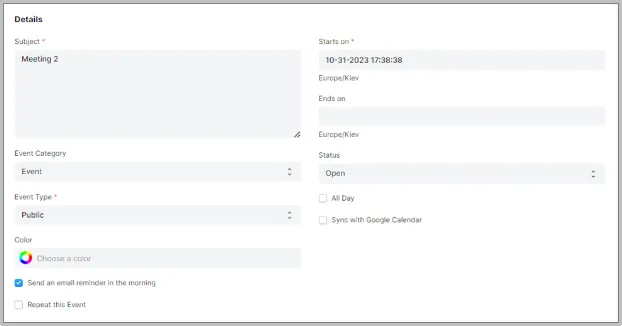
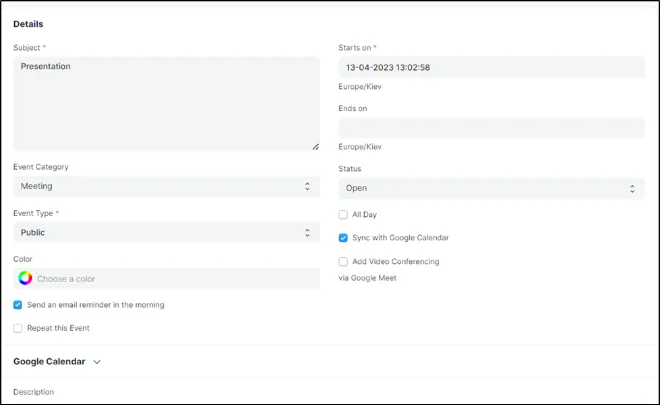
The event page contains the following fields and check-boxes:
- Subject field - summary of the event specified by the initiator of the event;
- Start on field – start date of the event specified by the initiator of the event;
- End on field – end date of the event specified by the initiator of the event;
- Event category field – category of the event specified by the initiator of the event;
Possible variants: correspond to task categories in Task pop up on Lead/Opportunity Activities page.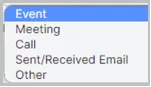
- Event type field – type of the event specified by the initiator of the event;
Possible variants: correspond to task types in Task pop up on Lead/Opportunity Activities page.

- Status field – displays the status of the event.
Possible variants:

- Color field – design the color of the display.
- Sync with Google Calendar check-box - describe in Sync with Google Calendar chapter.
- Send an email reminder in the morning check-box – reminder functionality.
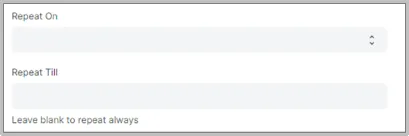
- Repeat this Event check-box – opens functionality for specifying repetition periods.
- Description field – text field for explanations.

- Participants table - contains information about participants of this event.
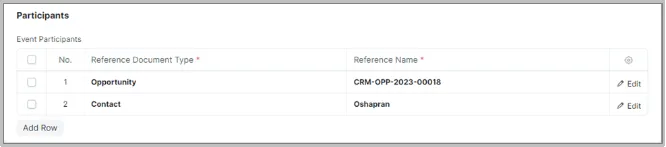
By default – Opportunity or Lead with reference for them.
Page contains functionality for adding other types of participants.
User can click on the Add Participants button at the top of the page and add necessary types.
![]()
Possible variants:
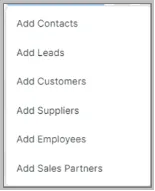
The most common variant is Add Contacts. This variant gives opportunity – add other employees.
NOTE: After creation, the assignee will be notified with the event notification.
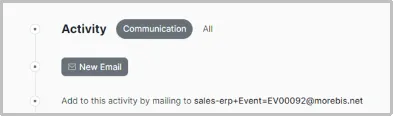
—Email block
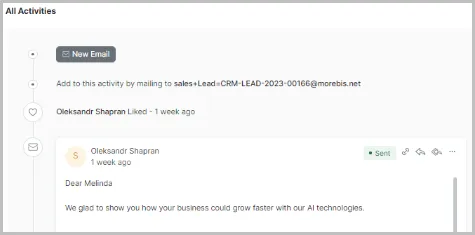
In this block user can:
- Create the email letter;
- See all history of communication with a lead.
1.User can create an email letter by clicking the New Email button.
![]()
The New Email popup is displayed.
2.User fills in all required fields:
FIELDS:
-From: sender’s e-mail.
-To: receiver’s email.
-Subject: title of the e-mail.
-Message: the main body of email.
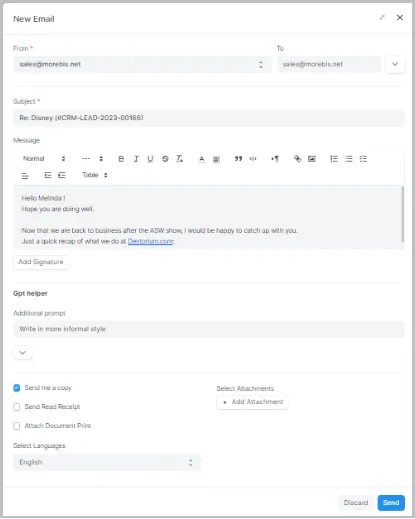
In pop up exist possibility to:
- add CC recipients and BCC recipients to the email and
- add a predefined template to the body of the email, by clicking on the ‘Open’ button at the left top corner of the pop – up.
![]()
The additional fields will be displayed in the pop up.
In the drop down list ‘Email template’ users can choose the correct variant of template.

After selection, the text of the template will be added to the body of the letter.
“Select Attachments” function:
Exist possibility to attach the file by clicking on the ‘Add Attachments’ button at the bottom.
The system adds the files/images to the letter.
“Send me a copy” function:
Exist possibility to send the copy of the letter to the author email by clicking on Send me a copy check box.
The system sends a copy of the letter to your email.
3. User clicks on the ‘Send’ button.
The system creates the letter and sends it to the lead.
- Comments tab
User can create notes by clicking the New Note button. This information can be changed and clarified.
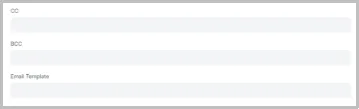
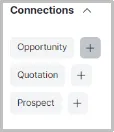
- Connections tab
On this tab user can create:
- Opportunity by clicking Opportunity button;
- Quotation by clicking Quotation button;
- Prospect by clicking Prospect button;
or open created doctypes if the button contains the number:
![]()
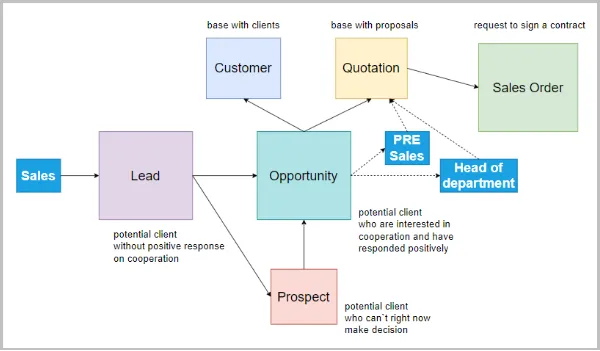
Opportunity is a qualified lead.
When you get a hint that a lead is looking for a product/service that you offer, you can convert that lead into an opportunity. You can also create an opportunity against an existing customer. Multiple Opportunities can be collected against a lead or a customer.
Relevant field values will be copied over.
Quotation is an estimated cost of the products/services you’re selling to your future/present customer.
During a sale, a customer may request for a note about the products or services you are planning to offer along with the prices and other terms of engagement.
A Quotation contains details about:
- The recipient of the Quotation
- The Items and quantities you are offering.
- The rates at which they are offered.
- Other charges (like shipping, insurance) if applicable.
- The validity of the contract.
- The time of delivery.
- Other conditions.
Prospect is a qualified customer with a significant perspective for cooperation.
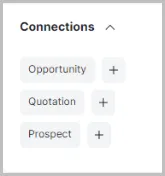
Lead workflow
Opportunity
How to Create an Opportunity
- Creation an Opportunity
Opportunity can be created in several ways:
-
During the lead flow:
- Connections tab on Lead page,
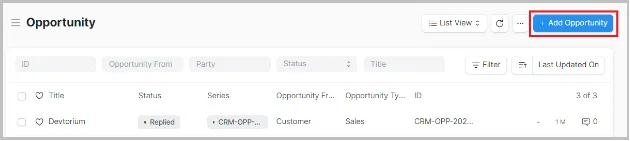
- Create button in the Header of Lead page,
- Add Opportunity button on Opportunity page,
-
Create button in the Header of Prospect page.
NOTE: During the Lead flow is a preferred variant!!!
- User uses one of the possible variants which are described above.
The New Opportunity page with fields to fill is displayed.
The page contains:
3 tabs with information and functions for work with opportunity:
- Details;
- Contacts;
- Item.
-
User fills in all the required fields.
-
User clicks on Save button in the Header of the page
The toast message “Saved” in the bottom of the page will be displayed.
![]()
The system saves and adds the opportunity to the Opportunity list page.
- Details tab on Opportunity page
On the Details tabs page has 4 blocks of information:
- Main block;
- Organization;
- Opportunity value;
- More Information.
—Main block
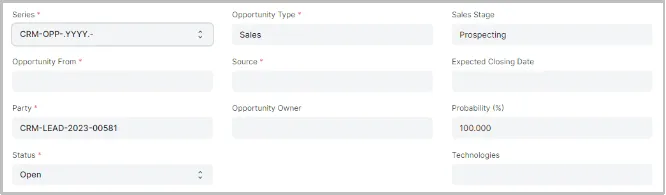
FIELDS:
-
Series – auto generation serial number.
NOTE: Required field.
-
Opportunity from – the initiator of opportunity: lead, customer or prospect.
NOTE: Required field. Will be specified in auto mode if Opportunity was created during the Lead flow.
-
Party – link to the initiator of opportunity.
NOTE: Required field.
-
Opportunity Type – configuration of product/service.
possible variants:
NOTE: Required field.
-
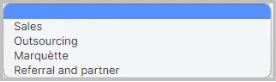
Source – drop down list with different variants for the sources of origin of leads.
possible variants:
Conference, Advertisement, Campaign, Cold Calling, Irene referral, Existing Customer, Mass Mailing, Personal network, Reciprocal communication, Toms Network, Abhisheks Network, Walk in and other.
*can be created by clicking on “+” in the bottom of the list.
NOTE: Required field.
- Opportunity Owner – person who creates the opportunity.
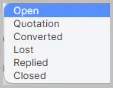
- Status – drop down list with different variants of the opportunity statuses.
Status is the important field in the Opportunity. You can set the status manually and also it will be updated automatically based on your actions against the opportunity.
possible variants:
NOTE: Required field.
-
Sales Stages – drop down list with different variants of the opportunity stages.
possible variants:
-prospecting,
-rejected,
-approved,
-converted.
-
Expected Closing Date – calendar with expected date for closing the opportunity .
-
Probability – % of success.
-
Technologies - a text field to indicate technologies that are of interest to potential customers.
—Organization

FIELDS:
-
№ of employees – the number of employees in an organization.
NOTE: Required field.
-
Annual Revenue - the revenue of an organization.
NOTE: Required field.
-
Industry - the industry of organization.
NOTE: Required field.
-
City - the location of the organization.
-
Country - the country of organization.
NOTE: Required field.
-
Website – Website of organization.
—Opportunity value

FIELDS:
- Currency – currency.
- Opportunity amount – the amount of opportunity.
—More Information

FIELDS:
-
Company - the name of the own company.
NOTE: Required field. By default - Devtorium.
-
Print Language - the language of communication.
*can be created on the Language page.
-
Opportunity Date – when the opportunity was created.
NOTE: Required field.
NOTE: If the user converts lead into an opportunity, according to the preferred variant of creation opportunity, all suitable information on the lead page will be transferred to the appropriate fields on opportunity page.
- Contact tab on Opportunity page:
On the Contacts tabs user can add contact information about user:

FIELDS:
- Contact person - contact person for organization.
- Job title - contact person job title.
- Contact Email – contact person’s email.
- Contact Mobile № – contact person’s mobile phone number.
- WhatsApp – contact person’s WhatsApp account.
- Phone – contact person’s phone number.
- Item tab on Opportunity page:
On the Item tabs user can add information about product/service which presented for client:
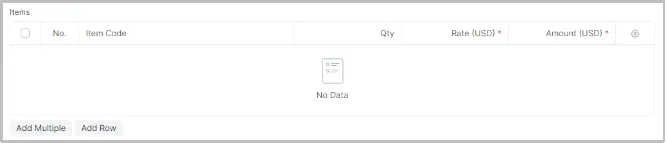
For creating the records, the user clicks on the Add Row button and specifies all necessary fields.
FIELDS:
- Item Code – title for product/service.
- Qty – the quantity of product/service.
- Rate (USD) – the rate of product/service.
- Amount (USD) – the amount of product/service.
Work with opportunity
User goes to the Opportunity list and clicks on Opportunity in the table.

The Opportunity page for this Opportunity is opened.
The page contains:
-
The Header with common functionality for Opportunity ( described in part - Header functionality )
-
4 tabs with information and functions for work with Opportunity:
-
Details;
-
Contacts;
-
Items;
-
Activities;
-
Comments;
-
Connections.

-Details, Contacts and Items tabs:
These tabs contain all the information that was added during the Opportunity creation process.
(Described in part – How to create an Opportunity)
This information can be changed and clarified.
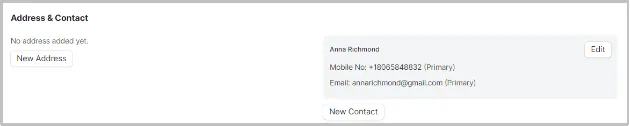
NOTE: To the Contact tab was added a new block for clarifying and adding new contact information.
Where users can New addresses and New Contacts in any quantity.
-Activities, Comments and Connections tabs:
These tabs contain the same functionality and configuration with the Lead page.
(Described in part – Work with Lead)
This information can be changed and clarified.
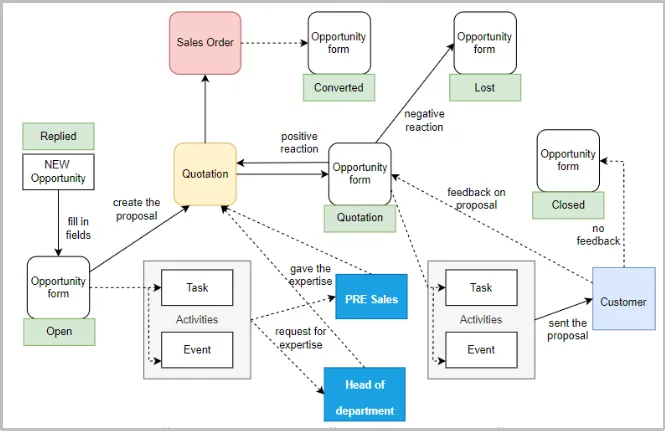
Opportunity workflow
Prospect
How to Create a Prospect
- Creation a Prospect
Prospect can be created in several ways:
-
During the lead flow:
- Connections tab on Lead page,
- Create button in the Header of Lead page,
-
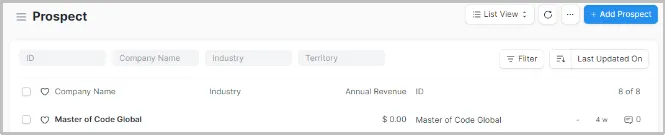
Add Prospect button on Prospect page,
NOTE: During the Lead flow is a preferred variant!!!
- User uses one of the possible variants which are described above.
The New Prospect page with fields to fill is displayed.
The page contains:

4 tabs with information and functions for work with Prospect:
- Overview;
- Address and Contact;
- Leads;
- Opportunities.
-
User fills in all the required fields.
-
User clicks on Save button in the Header of the page
The toast message “Saved” in the bottom of the page will be displayed.
![]()
The system saves and adds the Prospect to the Prospect list page.
- Tabs on Prospect page
- the Overview tab contains 7 fields of information:
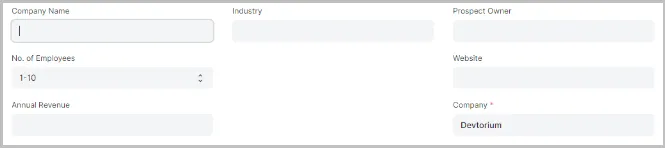
The meaning of these fields is the same as for leads and opportunities.
- the Address and Contact tab contains functionality for adding New Address and New Contact:

This information can be changed and clarified.
- the Leads tab contains table with information about Lead:

The meaning of these fields is the same as for leads and opportunities.
- the Opportunities tab contains table with information about Opportunity:

The meaning of these fields is the same as for leads and opportunities.
- the Activities and the Comments tabs
These tabs contain the same functionality and configuration with the Lead page. (Described in part – Work with Lead)
This information can be changed and clarified.
Quotation
How to Create an Quotation
- Creation an Quotation
Quotation can be created in several ways:
-
During the lead flow:
- Connections tab on Lead page,
- Create button in the Header of Lead page,
- Create button in the Header of Opportunity page,
-
Add Quotation button on Quotation page,
NOTE: During the Lead flow is a preferred variant!!!
- User uses one of the possible variants which are described above.
The New Quotation page with fields to fill is displayed.
The page contains:
![]()
3 tabs with information and functions for work with Quotation :
- Details;
- Address and Contact;
- Terms;
- More info.
-
User fills in all the required fields.
-
User clicks on Save button on the Header of the page
The toast message “Saved” in the bottom of the page will be displayed.
![]()
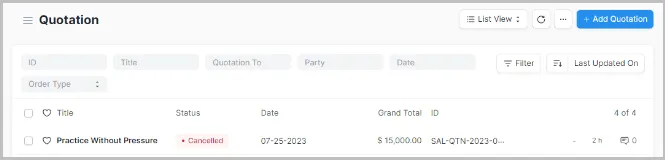
The system saves and adds the quotation to the Quotation list page.
- Details tab on Quotation page
On the Details tabs page has 4 blocks of information:
- Main block;
- Currency and Price List;
- Items;
- Taxes and Charges;
- Total;
- Additional Discount.
—Main block
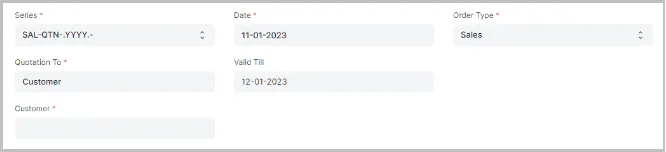
FIELDS:
-
Series – auto generation serial number.
NOTE: Required field.
-
Quotation To – the initiator of quotation: lead, customer.
NOTE: Required field. Will be specified in auto mode if quotation was created during the Lead flow.
-
Customer – text field with name of customer.
NOTE: Required field.
-
Order Type – configuration of product/service.
possible variants:
NOTE: Required field.
-
Date – calendar with date of creation the quotation.
NOTE: Required field.
-
Valid till – calendar with expected date for closing the quotation.
—Currency and Price List

FIELDS:
-
Currency – field with deal currency.
NOTE: Required field.
-
Price List – drop down list with ability choose and create new rates cards for deals.
possible variants:
.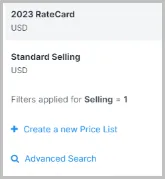
NOTE: Required field.
—Items
On the Item block user can add information about product/service which presented for client:

For creating the records, the user clicks on the Add Row button and specifies all necessary fields.
FIELDS:
- Item Code – title for product/service.
- Qty – the quantity of product/service.
- Rate (USD) – the rate of product/service.
- Amount (USD) – the amount of product/service.
The block contains functionality for Download and Upload the information to the table.
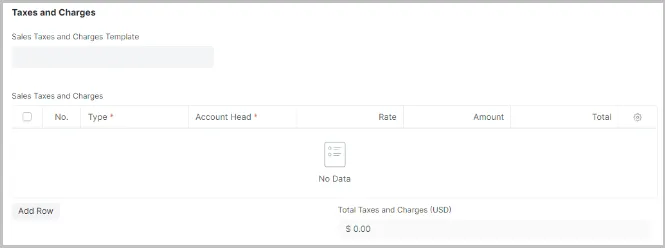
—Taxes and Charges
On the Taxes and Charges block user can add information about tax configuration for certain deal:
Work with Quotation
The Quotation page contains the same functionality and configuration as the Lead page.
- User goes to the Quotation page and clicks on Quotation in the table.
The Quotation page for this Quotation is opened.
The page contains:
-
The Header with common functionality for Quotation ( described in part - Header functionality )
-
5 tabs with information and functions for work with Quotation:
-
Details;
-
Address and Contact;
-
Terms;
-
More Info;
-
Connections.

-Details, Address and Contacts tabs:
These tabs contain all the information that was added during the Quotation creation process.
(Described in part – How to create an Quotation)
This information can be changed and clarified.
-Terms tab:
This tab contains the table with possible variants of payment terms for current Quotation.

FIELDS:
- № – number for term.
- Payment Term – configuration of payment terms.
- Description – description for payment terms.
- Due Date – final date for payment.
- Invoice portion – define part of the payment.
- Payment Amount – the amount of payment.
- Edit – functionality for editing current payment info.
-More info tab:
This tab contains the information about:
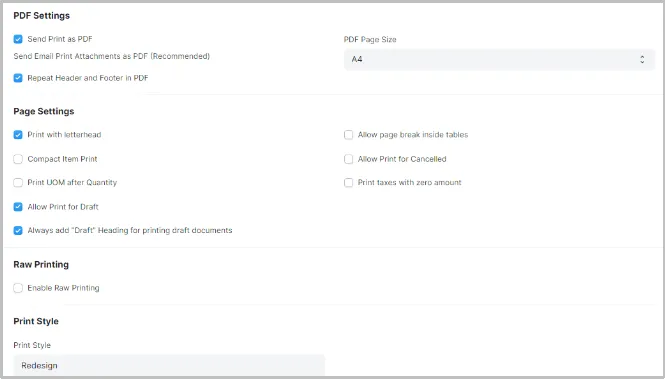
-Print Settings:

FIELDS:
- Letter Head – specifying the header for letter ( optional );
- Print Heading – specifying the style of payment - Credit or Debit Note( optional );
- Print Language – English by default;
- Group same items – optimization of items list ( optional ).
-Lost Reasons: info about Competitors, if Opportunity was lost.

-Additional Info - created in auto mode

-Connections tab:
This tab contains the same functionality and configuration with the Lead page.
(Described in part – Work with Lead)
This information can be changed and clarified.
- User defines all necessary information.
- User clicks the Save button in the top right corner.
- User clicks the Submit button in the top right corner.
- The Quotation is done.
!!! Additional function !!! - creation Proposal with information that was added on Quotation page
Proposal creation
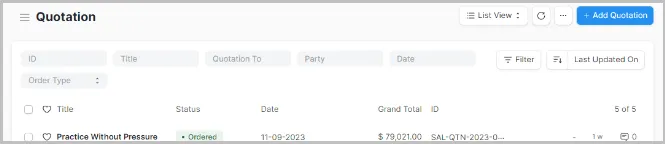
- User goes to the Quotation page and opens Quotation by clicking on the title of Quotation in the table.
- The Quotation page for this Quotation is opened.
- User clicks on the Setting button in the top right corner on Quotation page
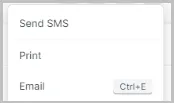
![]()
- User clicks on the Print link in the drop down list.
- The Proposal page for this Quotation opens.
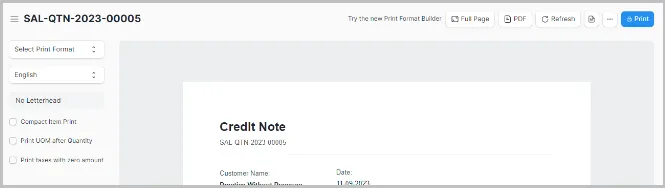
The page contains:
-
Header:
-
Full page - open a fully;
-
PDF - open in PDF format;
-
Refresh - reload page;
-
Form - back to the Quotation page;
-
Settings:
- Print Settings - function for changing the print configuration;
- Customize Settings - function for changing the proposal configuration during printing .

-
Print - print the Proposal .
-
Left sidebar
-
Select Print Format - the variant of Print format defined on Customize Settings;
-
Language - select language for Proposal ( English by default );
-
Letter Head - the variant of Letter Head defined on More info tab;
-
Compact Item Print - optimization of items list;
-
Print UOM after Quantity - Proposal content configuration;
-
Print taxes with zero amount - Proposal content configuration.
-
Main field - visualization of created Proposal
Sales Order
How to Create an Sales Order
The Sales Order can be created after the Quotation is done.
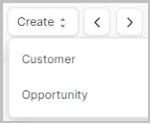
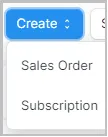
- User clicks on the Create button in the Header of Quotation page.
- User clicks on the Sales Order link in the following drop down list.
- The Sales Order page for this Quotation is opened.
The configuration of the Sales Order page is the same as Quotation page.
The user should specify only Delivery Date for Items.

- User clicks on the Save button
Sales workflow
Import data
The function Import data is possible for 4 entities:
-Lead;
-Opportunity;
-Customer;
-Contact.
For starting this function, the user has to click on the Menu button in the Header of page any of these entities. In the drop down list users can see Import button.
After clicking on the Import button the User will be redirected to the Data Import page.
- Data Import process
User opens the Data Import page.
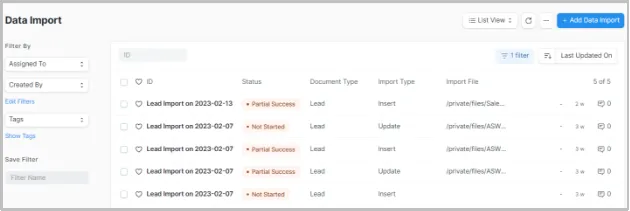
The Data Import page contains:
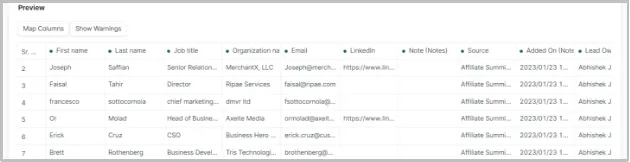
- The table with data that has been loaded;
- Functionality for filtration;
- Add Data Import Button.
The table with data has 5 columns:
-ID – created file name;
-Status;
Possible variants: Not Started and Partial Success.
-Document Type;
Possible variants: depends on entities.
-Import Type;
Possible variants: Insert New Records or Update Existing Records
-Import File flow;
Main filters for page:
By default all pages in CRM have 2 types for filtration:
- Assigned To;
- Created By.
User can add other indicators for filtration by clicking on Edit Filter link
For creation, a new Data import user can click on the Add Data Import button and the New Data Import Pop up will be opened.
- New Data Import process
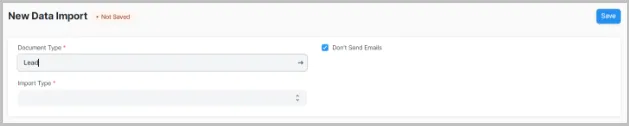
On New Data Import Pop up user has specify the:
-
The Type of document;
-
The Import Type:
Possible variants: Insert New Records or Update Existing Records.
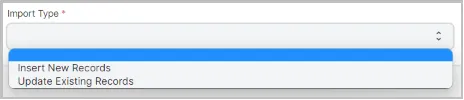
In variant Insert New Records – new lead will be added to the base.
In variant Update Existing Records – the lead is already in the base and import helps with updating the information about lead.
After clicking on the Save button on the New Data Import Pop up, the User will be redirected to the New Data Import page.
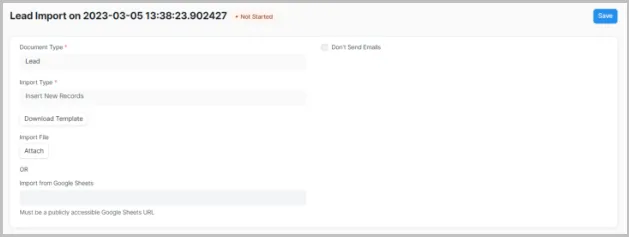
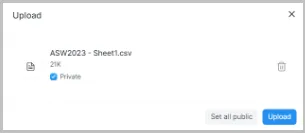
On the New Data Import page the User can attach .csv or .xls. by using the Import file button or specify URL in Import from Google Sheets field.
The Data files can be attached in the different way:
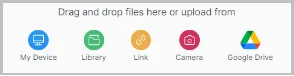
After attaching the file, the user clicks the Upload button.
The data from the file will be analyzed for the correctness of the import, and a report about this will be generated by the system on the New data import page.
If the report contains Errors and Warning about importing data, users can fix these issues (section Errors and Warning).
After this User can start importing by clicking the Start import button in the top of page.
The result of the import will be shown in a notification at the top of the page.

NOTE: In variant Insert New Records – file with data must not contain the information about ID.
In variant Update Existing Records – file with data must have information about ID ( example ID - CRM-LEAD-2023-…..).
- Import Log
- Import Log will be visible on the bottom on the New import page after import file.
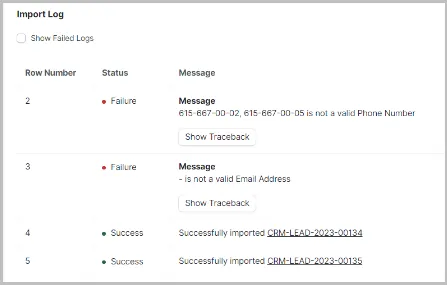
In the Import Log user can see:
- the status of import for each row;
Possible variants: Failure and Success.
- the message for each row about result of data import with an explanation of possible errors;
- Errors and Warning
- Report on the New data import page can contain Errors and Warning about importing data:
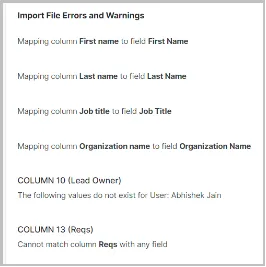
- Besides this User can see the potential result of import in the table below:
-
green label at the top of the column says that the column will be imported successfully;
-
red label at the top of the column says that the column contains errors with mapping.
-
Errors with mapping can be fixed by specifying correct fields. This specifying can be realized by clicking the Map Columns button.
-
Map Columns pop up will be opened and user can specify the correct field name in the right column list.

- After clicking the Submit button all changes will be added to the tablet.
- Files template
The** New Data Import page contains functionality ( Download Template button ) for creating templates for filling in information received from outside and for its subsequent addition to the system.
-
After clicking on the Download Template button the Template export pop up will be opened.
-
Formats for templates can be selected in File Type.
Possible variants: .csv or .xls.

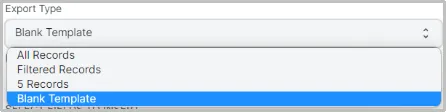
- Amount of records for templates can be selected in Export Type.
Possible variants: All records, Filtered records, 5 records or blank template.
-
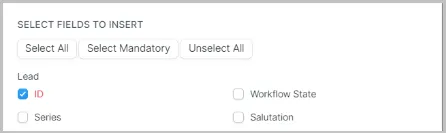
Configuration fields for templates can be selected in Select fields to insert blocks.
Possible variants: Select All, Select Mandatory or Unselect All.
In the list of this block, the user can manually select the fields to be added to the template by checking the checkboxes next to the name of the required field.
For each entity the list of fields is different and depends on fields which exist on the page of this entity.
NOTE: When working with importing files, it is preferable to use templates. If the data file differs significantly from the template, then errors may occur during import. (see: Errors and Warning)
Possible mistakes:
-
the data plate is not on the first line;
-
dates and numbers in the table are not in the correct format;
-
the file with data in variant Insert New Records haven`t the information about ID;
-
Full name of the lead is located in one field.
Sync with Google calendar
\1) User goes to the Lead list and clicks on Lead in the table.
\2) User clicks on Activities tab on the page
![]()
The Activities tab is displayed.
\3) User creates the event by clicking the New Event button.
![]()
The New Event pop up is displayed.
\4) User fills in all required fields:
FIELDS:
-Date: calendar to indicate the date when the event will be.
-Assign To: the user to whom this event will be assigned.
-Summary: title of the event.
-Comment: description for event.
\5) User clicks on the ‘Create’ button.
The system creates the event and adds to the Open event field.
NOTE: After creation, the assignee will be notified with the event notification.
6) User clicks on title of the Event
The New Event page is displayed.
\7) All mandatory fields will already be filled in:
BUT:
User has to specify the End on event in the End on field ( if not the system adds in auto mode 1 hour).
\8) User clicks on Sync with Google Calendar check box
The system adds the Google Calendar block below with the field the Google Calendar.
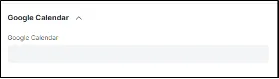
\9) Users specify their own Google Calendar to this field.
\10) User clicks on the ‘Save’ button.
After creation, the event will be added to the user Google Calendar.

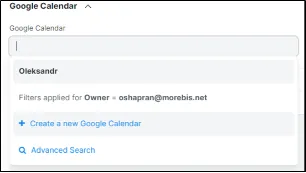
If user doesn’t have Google Calendar
\1) User clicks on Create a new Google Calendar in the Google Calendar block.
Users will be redirected to the New Google Calendar page.
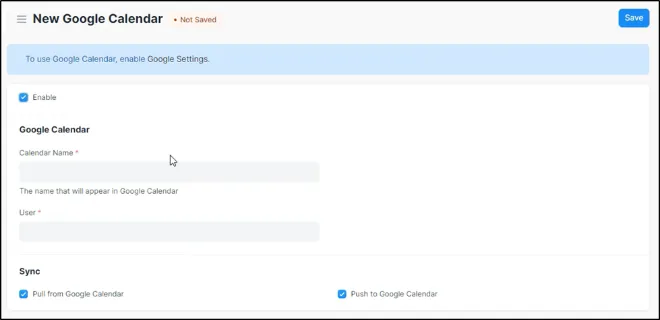
\2) User fills in all required fields:
FIELDS:
-Calendar name: edited field;
-User: add user account ( morebis domain ).
\3) User clicks on the ‘Save’ button.
After this, User must authorize his Google Calendar in Google Calendar list
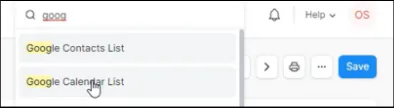
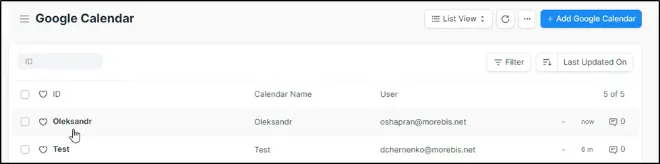
-User open the Google Calendar list ( It can be found in search field )
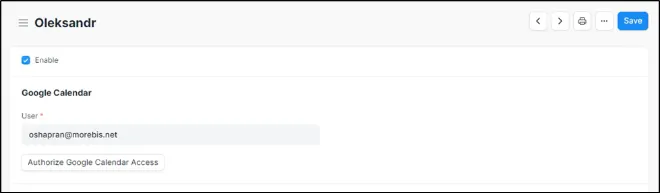
-User clicks on his Name of Google Calendar and open page with his calendar
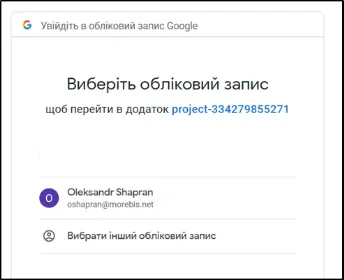
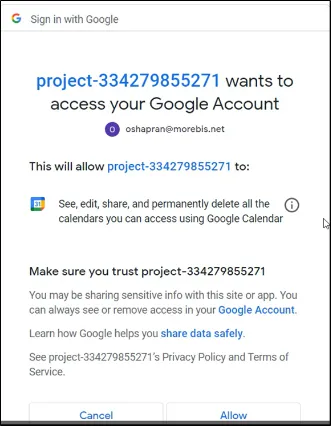
-User clicks on the Authorize Google Calendar Access button.
User will be redirected to Google where he can choose own account.
-User clicks on the Allow button at the bottom of the pop up.
-User comes back to the page with his calendar in the CRM and clicks on the Sync Calendar button.

The Google Calendar ID will be added to this page.

-User clicks on the Save button on the page with his calendar.
Reports on CRM page
The CRM page contains 2 types of reports:
- Standard - predefined configuration of the app report:
- Custom - manually configured and can be change:
Standard reports:
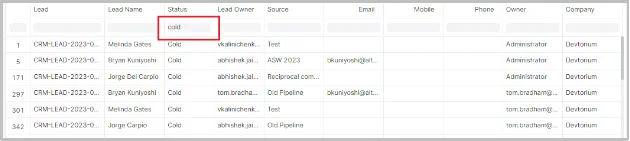
- Lead Details
This report provides all information which exists on the lead page: lead name, status, lead source, last activity date, activities, contact details and other details.
User can get actual information about leads in one table with the possibility of configuring the grid by using suitable filters.
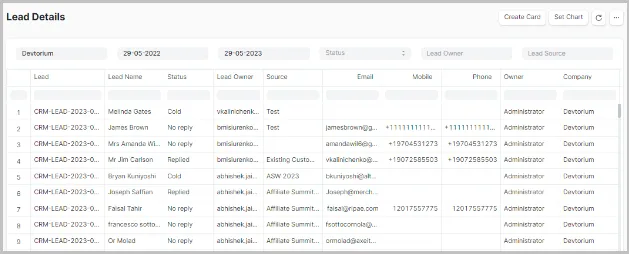
User can filter the data by using main filter fields:
- Period – start date and end date;
- Status – drop down list with all possible variants of statuses;
- Lead owner - drop down list with all possible variants of owners;
- Lead source - drop down list with all possible variants of lead source;
After specifying the configuration of filters, the table will be changed according to the defined configuration.
Beside this, users can filter the data by using internal filters in the table.
Page of the report contains additional functions.
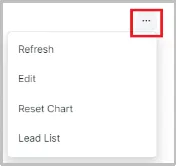
User can click on Menu button ![]() and drop down list with function will be opened.
and drop down list with function will be opened.
Additional functions:
- Edit report:
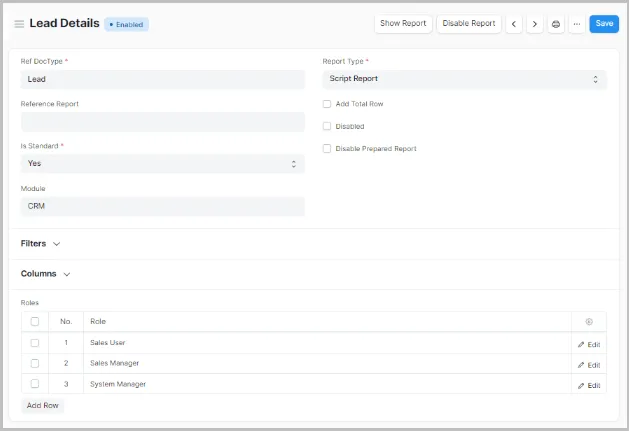
By using this function, users can configure a new report which will be based on old configuration and data.
For creation report users have to specify configuration of Filters, Columns and Roles permission.
NOTE: In general, the user has this option, but without knowledge and experience in this area, the report may be broken, so if you want to configure a new report, ask the administrator.
- Print the report:
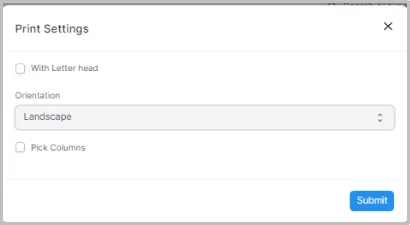
Before printing, User can configure the options for print:
-
with or without Letterhead;
-
orientation: landscape or portrait;
-
-pick Columns.
-
Save report in PDF format;
Users can configure the options for saving in PDF format in the same way as with printing.
- Export report in excel file;
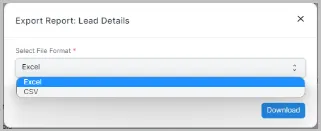
Before export, User has to select the file format.
- Setup auto mailing on user email;

The User can add Auto Email report for this report.
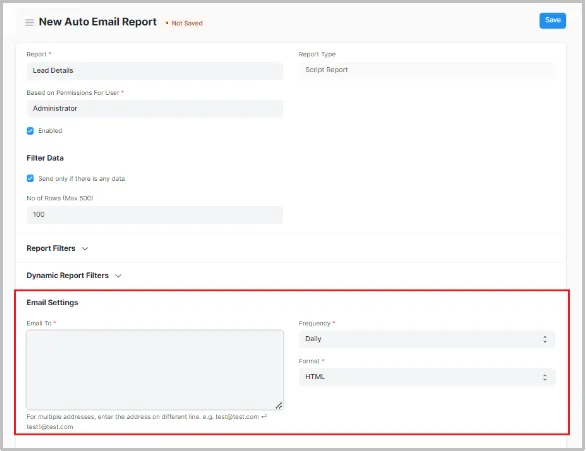
After clicking on Add Auto Email report button User will be redirected to the New Auto Email Report page where user has to specify:
- email for auto report;
- frequency;
- form ( HTML, CSV, XLSX )
After saving this page, mailing with defined configuration will be implemented.
- Add column to the table;
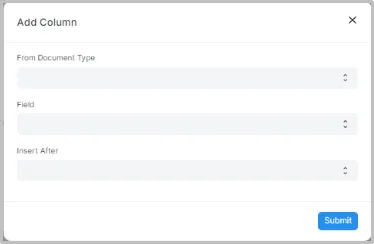
The User can add a new column to this report. User has to specify:
- what type document contains necessary information;
- which field must be added;
- after what column this new column must be inserted.
- Save specified changes.
- Sales pipeline Analytics
User can get actual information about creation opportunities during some period and owner of these opportunities can configure the grid by using suitable filters.
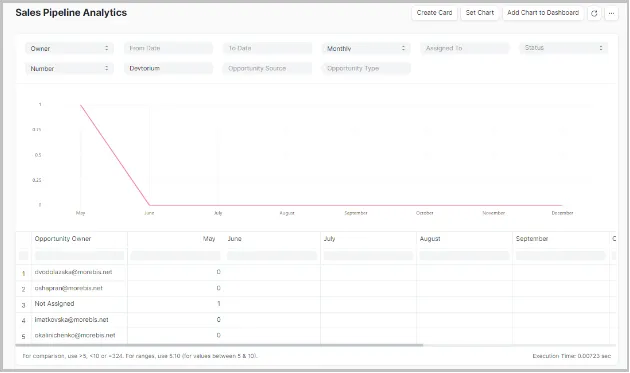
User can filter the data by using main filter fields:
- Period – start date and end date OR monthly and quarterly;
- Assigned to - drop down list with all possible variants of users;
- Status – drop down list with all possible variants of statuses;
- Ranging by number or amount;
- Opportunity source - drop down list with all possible variants of source;
- Opportunity type - drop down list with all possible variants of opportunity types;
After specifying the configuration of filters, the table will be changed according to the defined configuration.
Page of report contains additional functions in the configuration the same with Lead Detail report page.
- Opportunity Summary by Sales Stage
This report has the same information about opportunity like a previous report Sales pipeline Analytics but with information about Sales Stages for this Opportunity.
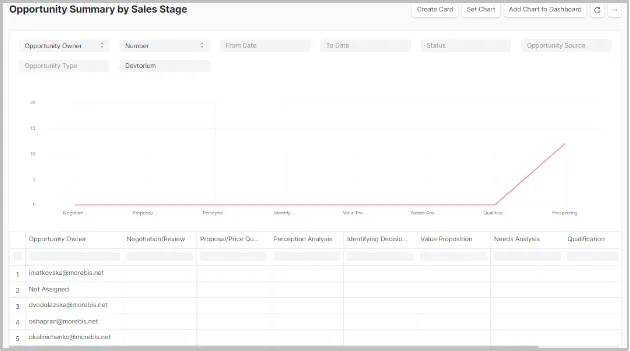
Users can get the information about the amount of opportunities for each Sales stage for creation opportunities during some period and the owner of these opportunities can configure the grid by using suitable filters.
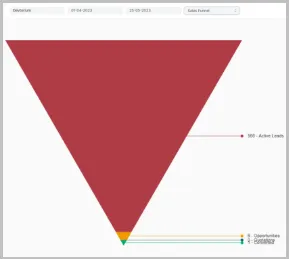
- Sales Funnel
This report visualizes information about the efficiency of lead processing and the transition of active leads to the next level of communication, such as Opportunity and Quotation.
Users can see how many active Leads exist and how many Opportunity and Quotation were created after working with these leads.
By using the sales funnel report, and by quantifying the number of prospects at each stage of the process, you can get an idea about the amount of your potential customers.
- Prospects Engaged But Not Converted**
Using this report, the user gets the information about the leads that have shown interest in the business with you but due to some reason they were not converted into the customers.
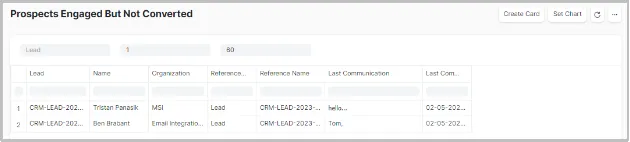
In this report users can see the list of leads.
Beside this, user can filter the leads by specifying:
- The number of interaction with these leads;
- How old these leads - the minimum Lead Age (Days).
Page of report contains additional functions in the configuration the same with Lead Detail report page.
- First Response Time for Opportunity**
This report gives you the details about time taken by sales executives for response to an opportunity. Lesser the average time for first response the better.
Users can input the date range for which you would like to analyze the minutes to first response. The line graph is shown on the top and date wise details at the bottom.
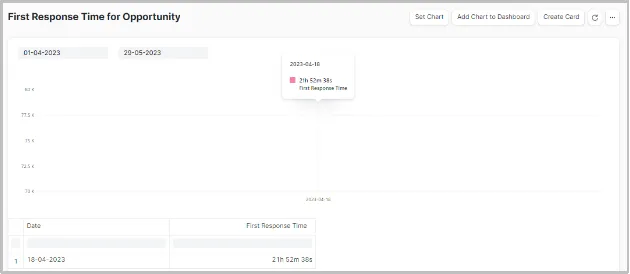
Page of report contains additional functions in the configuration the same with Lead Detail report page.
- Campaign Efficiency**
This report gives you the details about the effectiveness of Mail Campaign, if the company conducts this activity.

- Lead Owner Efficiency
This report provides information about Lead Owner Efficiency – how many units of Leads, Opportunity, Quotation and Order were created in CRM during a certain period of time.
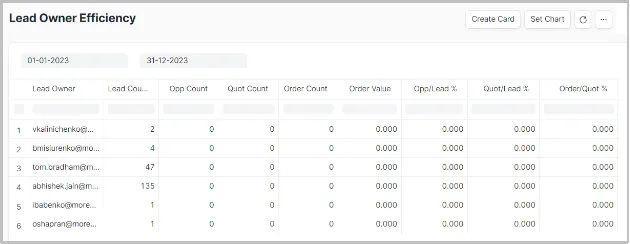
User can input the date range for which you would like to analyze the efficiency.
Page of report contains additional functions in the configuration the same with Lead Detail report page.
Custom reports:
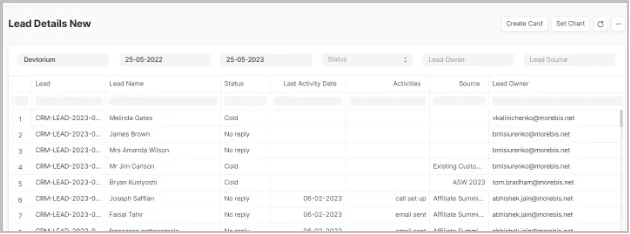
- Lead Details New
The report page contains the same configuration as the Lead Detail report page, but it has been optimized as requested by the Sales Department team - contains fewer columns.
This report provides all information which exists on the lead page: lead name, status, lead source, last activity date, activities, contact details and other details.
Page of report contains additional functions in the configuration the same with Lead Detail report page.
- Lead Activity
This report provides all information about all activities which were changed in the Activities during the past 7 days.
Activities: Lead Event, Lead Task and Lead Email.
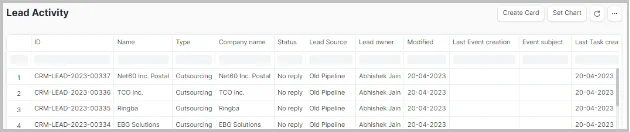
Users can filter the data by using internal filters in the table.
Page of report contains additional functions in the configuration the same with Lead Detail report page.
- One Lead Activity
This report provides information about all activities for one lead.
Activities: Lead Event, Lead Task and Lead Email.
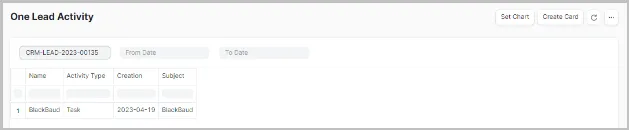
Users can specify the lead and input the date range for which the user would like to analyze changes for this lead.
Page of report contains additional functions in the configuration the same with Lead Detail report page.
- All Leads Activity
This report provides information about all activities for all leads during the selected period.
Activities: Lead Event, Lead Task and Lead Email.
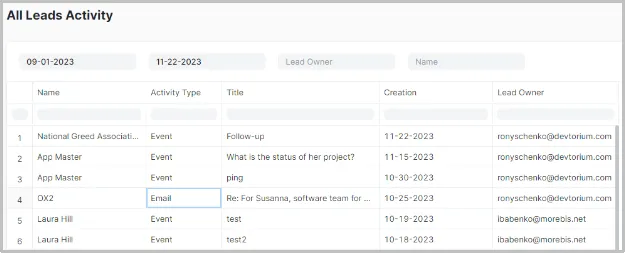
User can specify the date range for which he would like to see a list of all activities performed for all leads .
Page of report contains additional functions in the configuration the same with Lead Detail report page.
- Event new
This report provides information about all events for all users according to the Activity log.
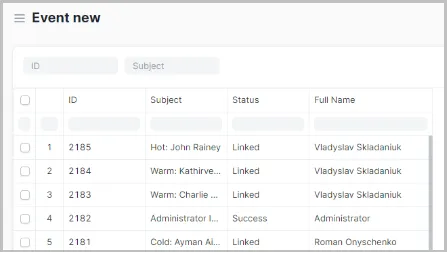
- ID - the ID number for Event;
- Subject - the description for Event;
- Status - current status of implementation;
- Full name - the author of the Event.
Notification in CRM
Common functionality:
On the Header of the CRM user can see:
![]() - the notification button;
- the notification button;
After clicking on this button, the user opens pop-up:
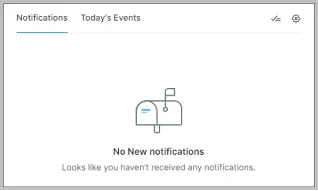
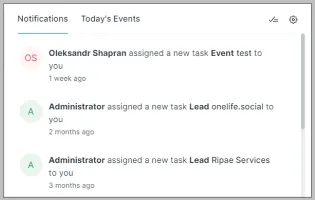 **
**
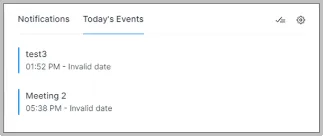
- Today’s Events – tab with notifications for tasks;
 – ‘Mark all as read’ function;
 – Notification Settings.
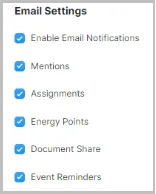
User can click on the Notification Settings and set up:
-enable/disable notifications and specify a list of entities for notifications;
-configuration of notification by selecting the check boxes:
Document Follow:
Each User can specify his own configuration of notifications for Document follow:
- for all documents;
This block exists in User tab > User:
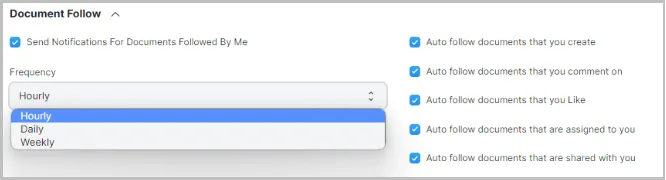
User should:
-In the Document Follow section, tick the “Send Notifications for documents followed by me” checkbox.
-Set the frequency at which you want to receive emails.
-Select configuration:
Now, you can receive emails for the documents you follow.
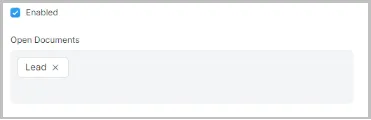
- for specific documents;
This block exists on each document in the bottom right corner:
User will be automatically followed after activating Document Follow.
Create specific notification
- User opens the Notification page.
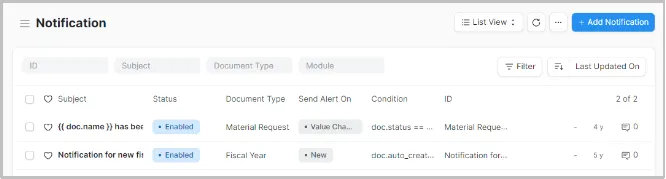
The page contains:
- Header;
- table with created notifications
The table functionality is typical for CRM.
- User clicks on the Add Notification button.
The create notifications page appears.
- User fills in all the required fields.
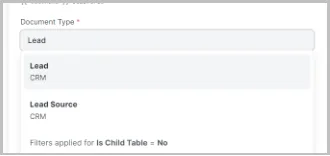
- Select the Document Type you want to watch changes on.
-
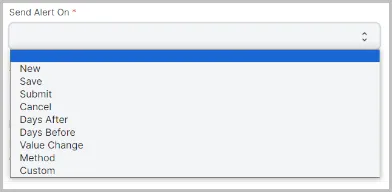
Define what events you want to watch under Send Alert On. Events are:
-
New: When a new document of the selected type is made.
-
Save/Submit/Cancel: When a document of the selected type is saved, submitted, or canceled.
-
Days Before/Days After: Trigger this alert a few days before or after the Reference Date.
To set the days, set Days Before or After. This can be useful in reminding you of upcoming due dates or reminding you to follow up on certain leads of quotations.
-Value Change: When a particular value in the selected type changes.
-Method: Sends notification when a specific method is triggered. Eg: before_insert.
-Custom: Send a notification to an Email Account selected.
-
Turn on the “Send System Notification” option if you want the notification to show up in the notifications dropdown on the top right corner of the navigation bar.
-
In the “Sender Email” form write down the email created for notification
-
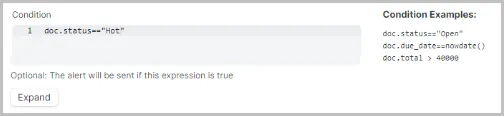
Set additional Conditions if required.
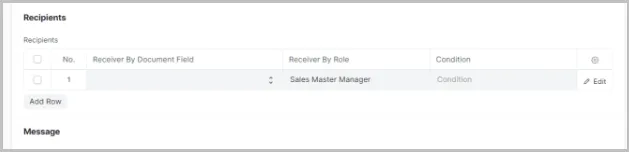
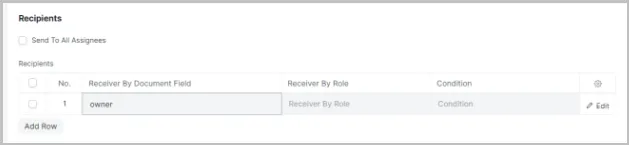
- Set the recipients of this alert. The recipient could either be a field of the document or a list of fixed Email Addresses.
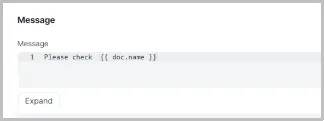
- Compose the message.

- User clicks on the Save button.
For instance:
1 . User needs to configure a notification for Lead status changing.
To do this user needs to indicate the Value Change option in the Send Alert On field and choose the status (Status) option in the Value Changed field
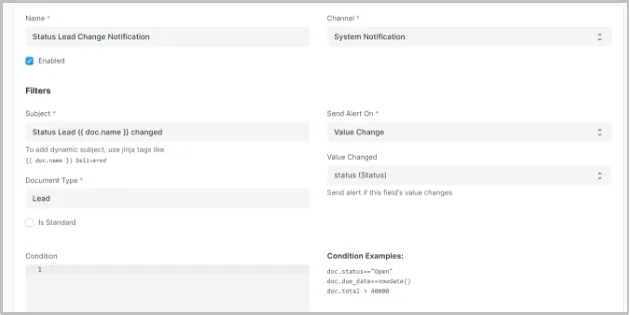
Or we can add add Condition, doc.status==”Hot”
And recipients received notification only, when Lead status changed to Hot. You can also set more complex conditions by combining them with the operator and or or.
Now we have to write a notification. We can use Jinja and HTML tags to make the message dynamic.
2 . User needs to configure a notification for creating any Doctype.
To do this we need to indicate the New option in the Send Alert On field and choose the Document Type for example Opportunity or Quotation.
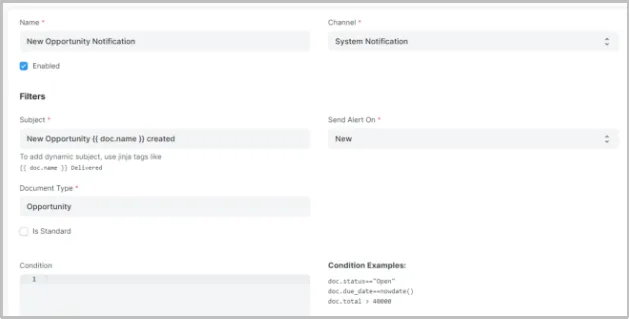
And add as recipients all users with role Sales Master Manager or Presales Manager